On Sunday, January, the class reconvened for session 2.
At the end of session 1, the instructor left with the student’s pheasant which was feathers, skin, bone, and wire supports for the wings and legs. The birds were tumbled dried in moisture absorbing media. https://www.norco.club/2017/12/18/taxidermy-class-session-1-all-students-learning-the-trade-and-technique-with-flying-colors/
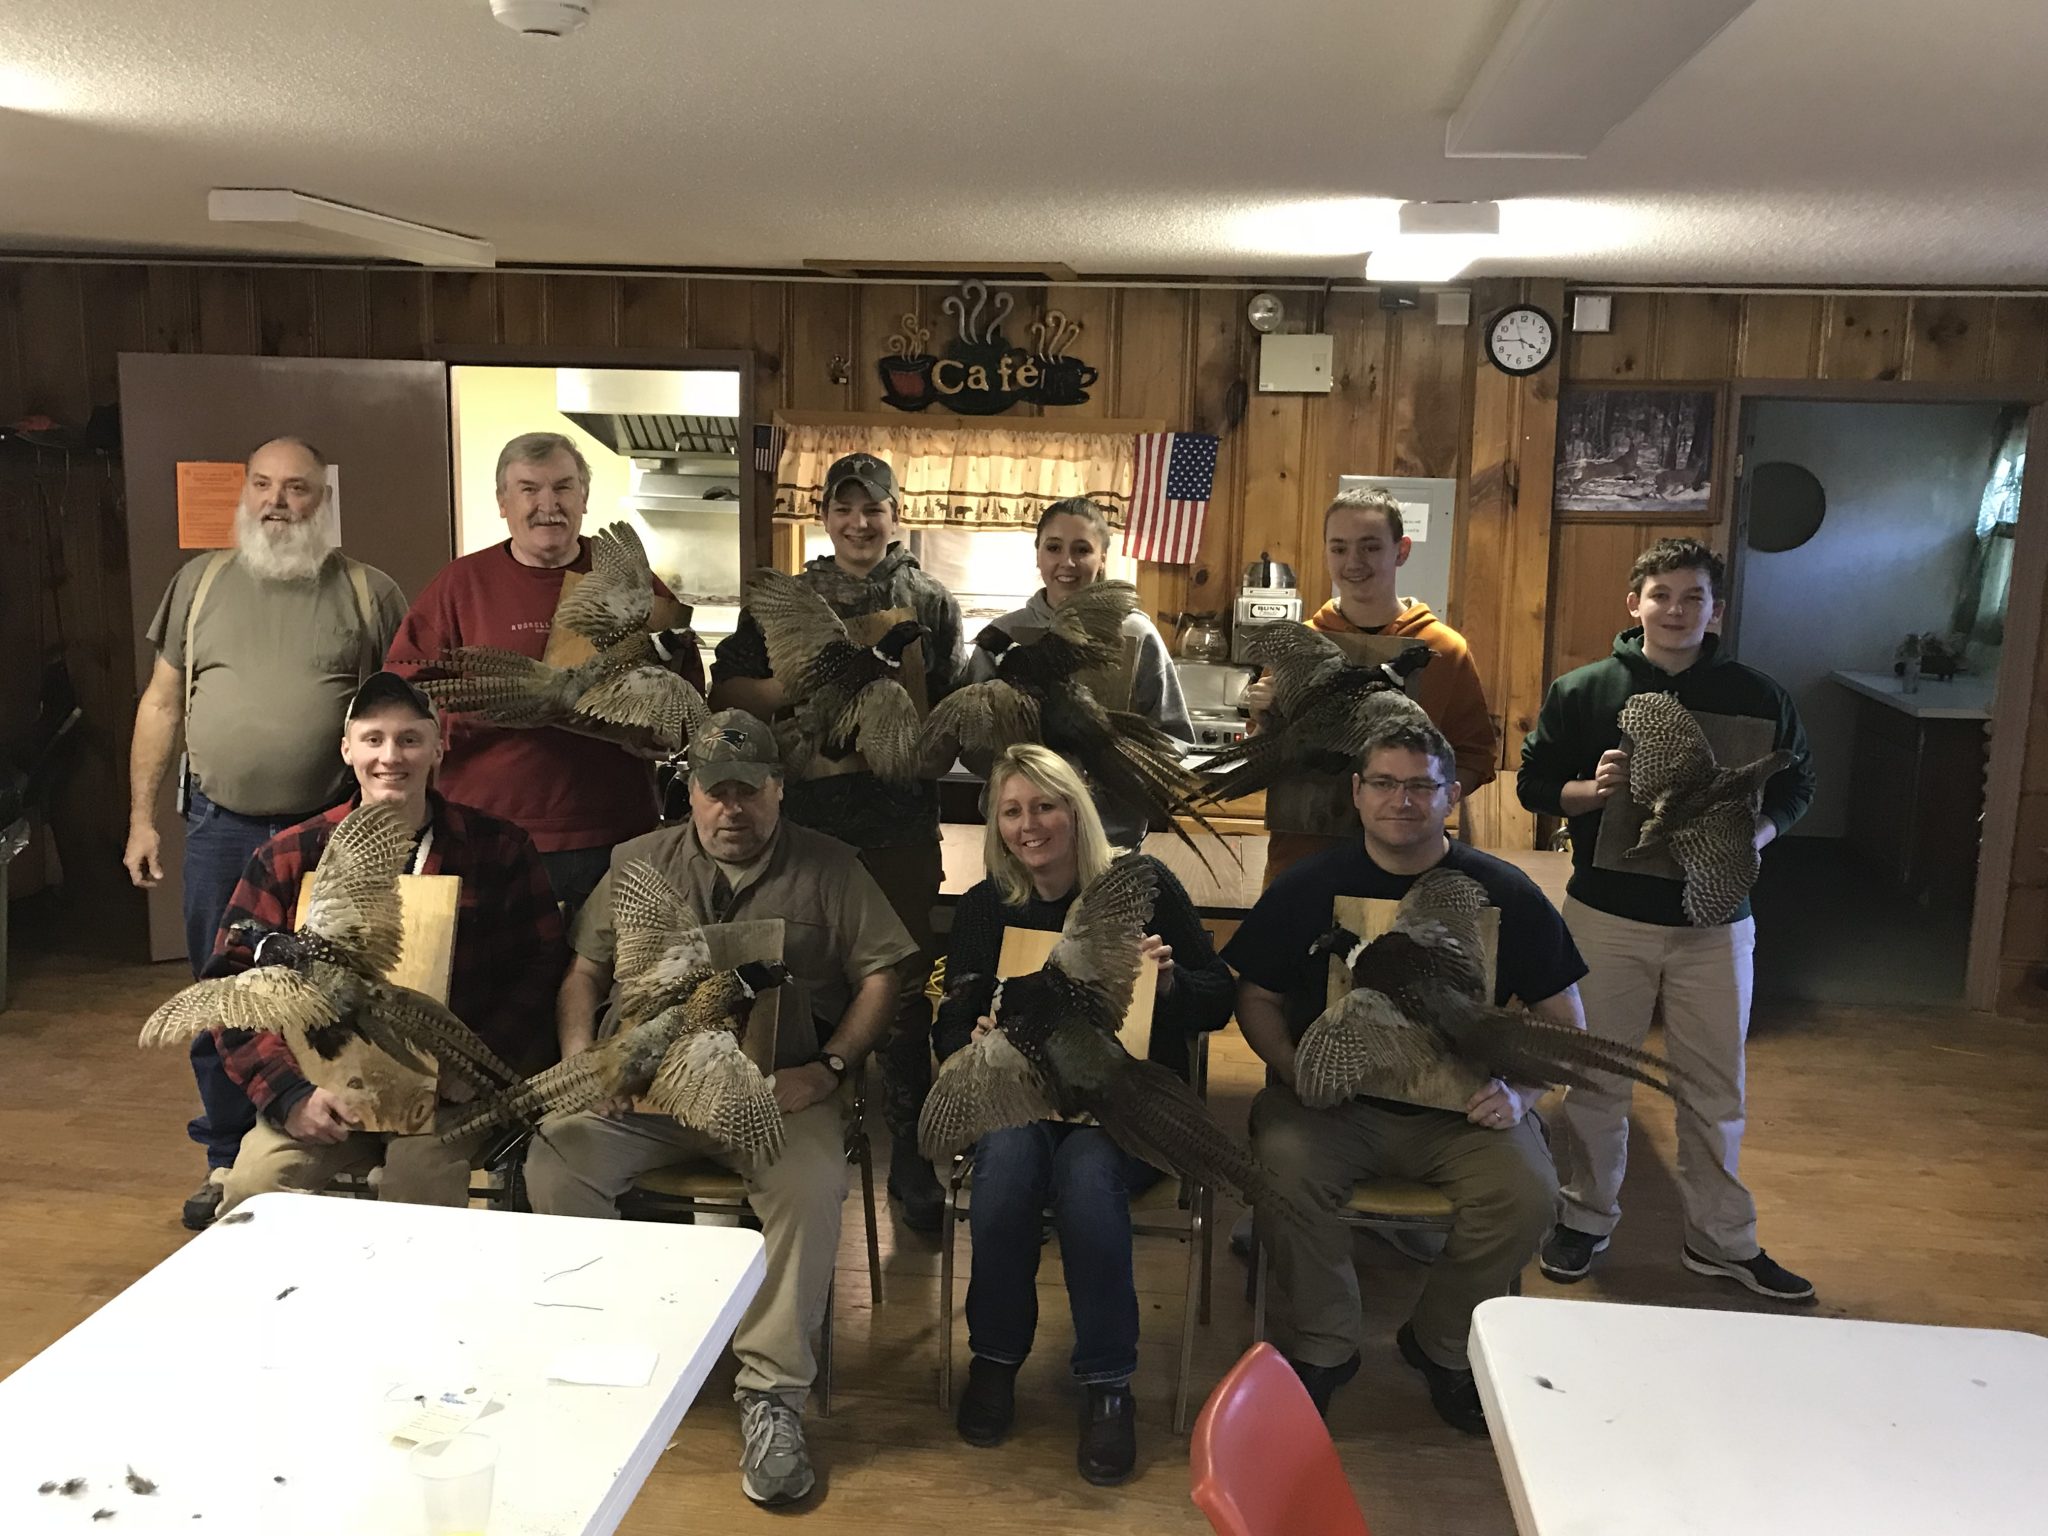
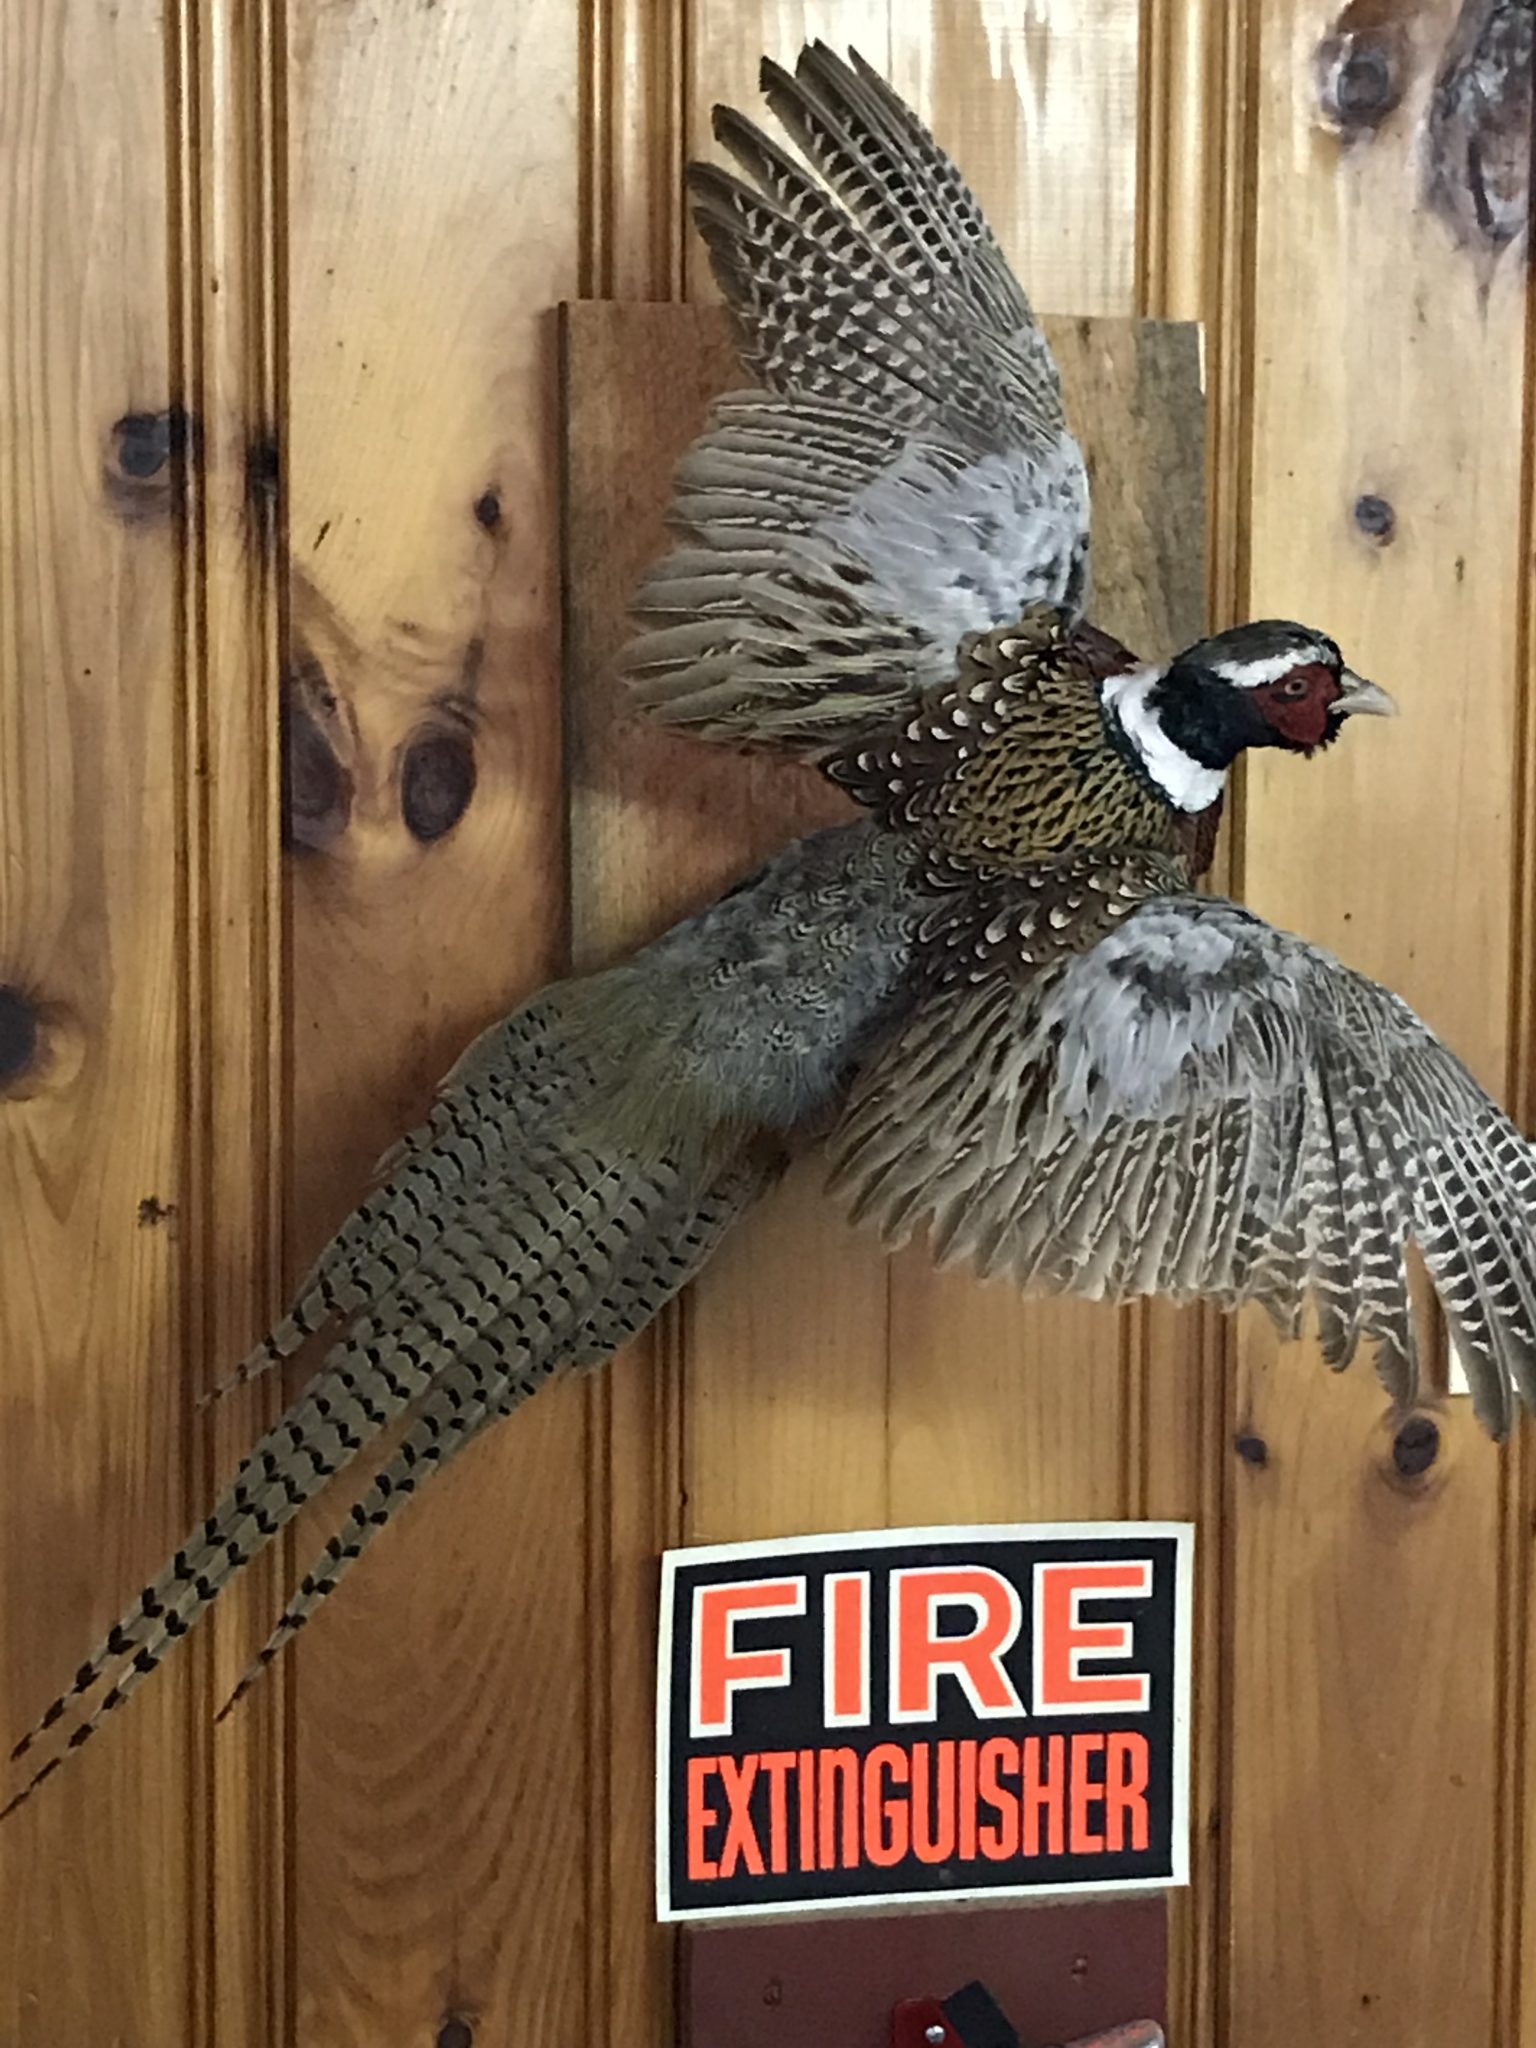
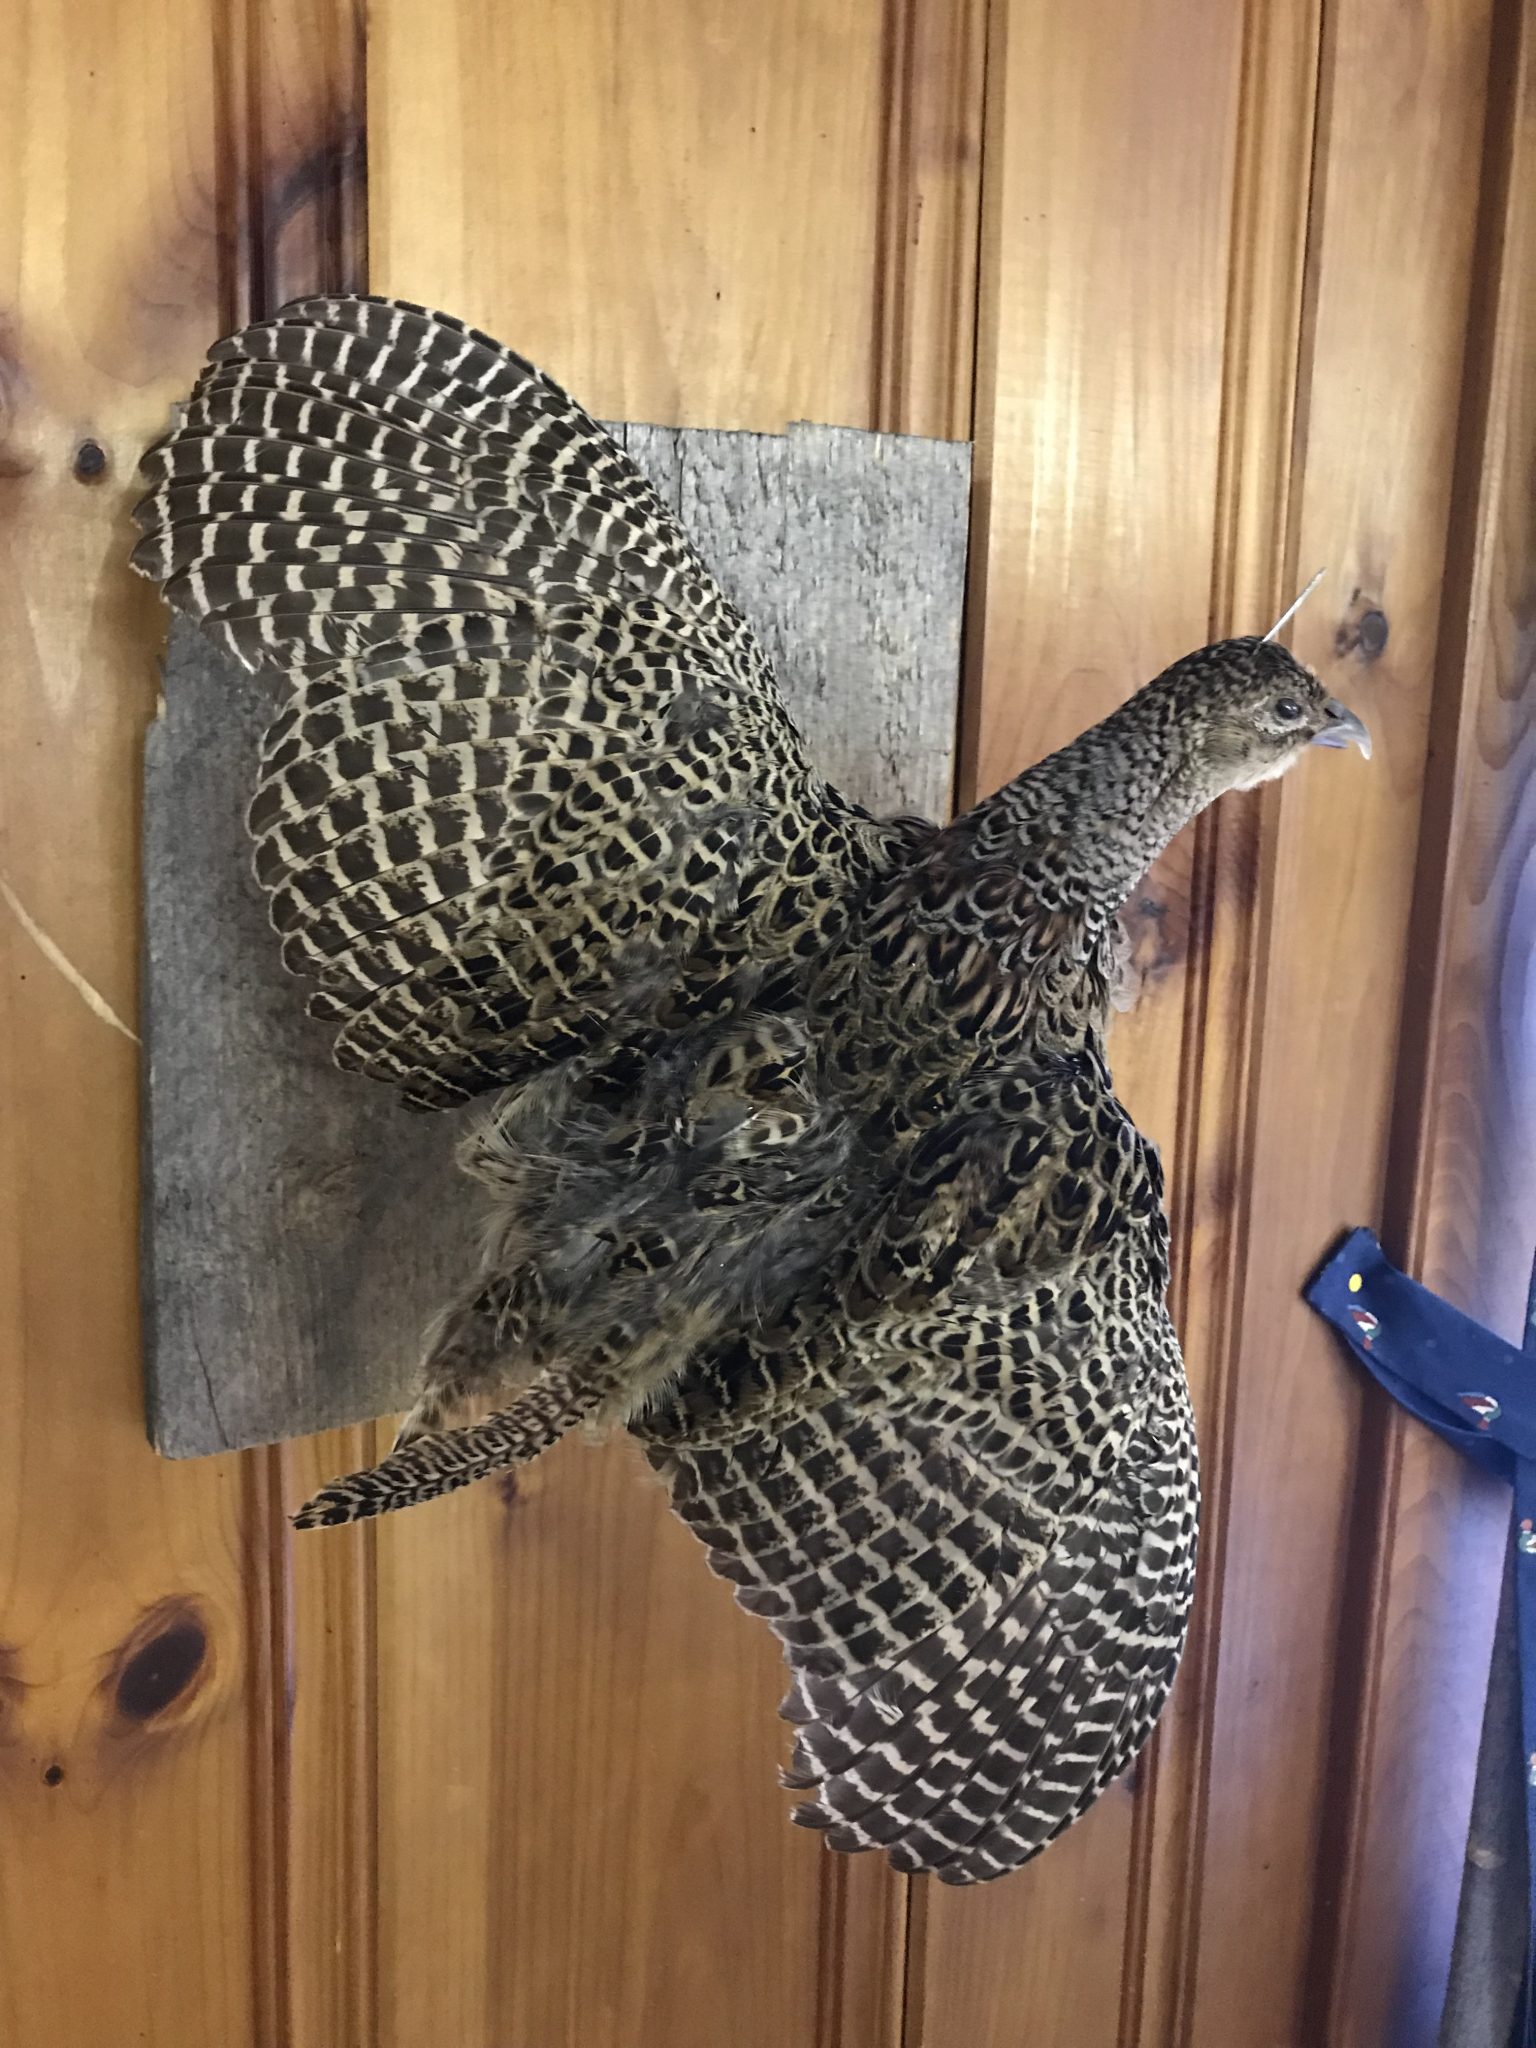
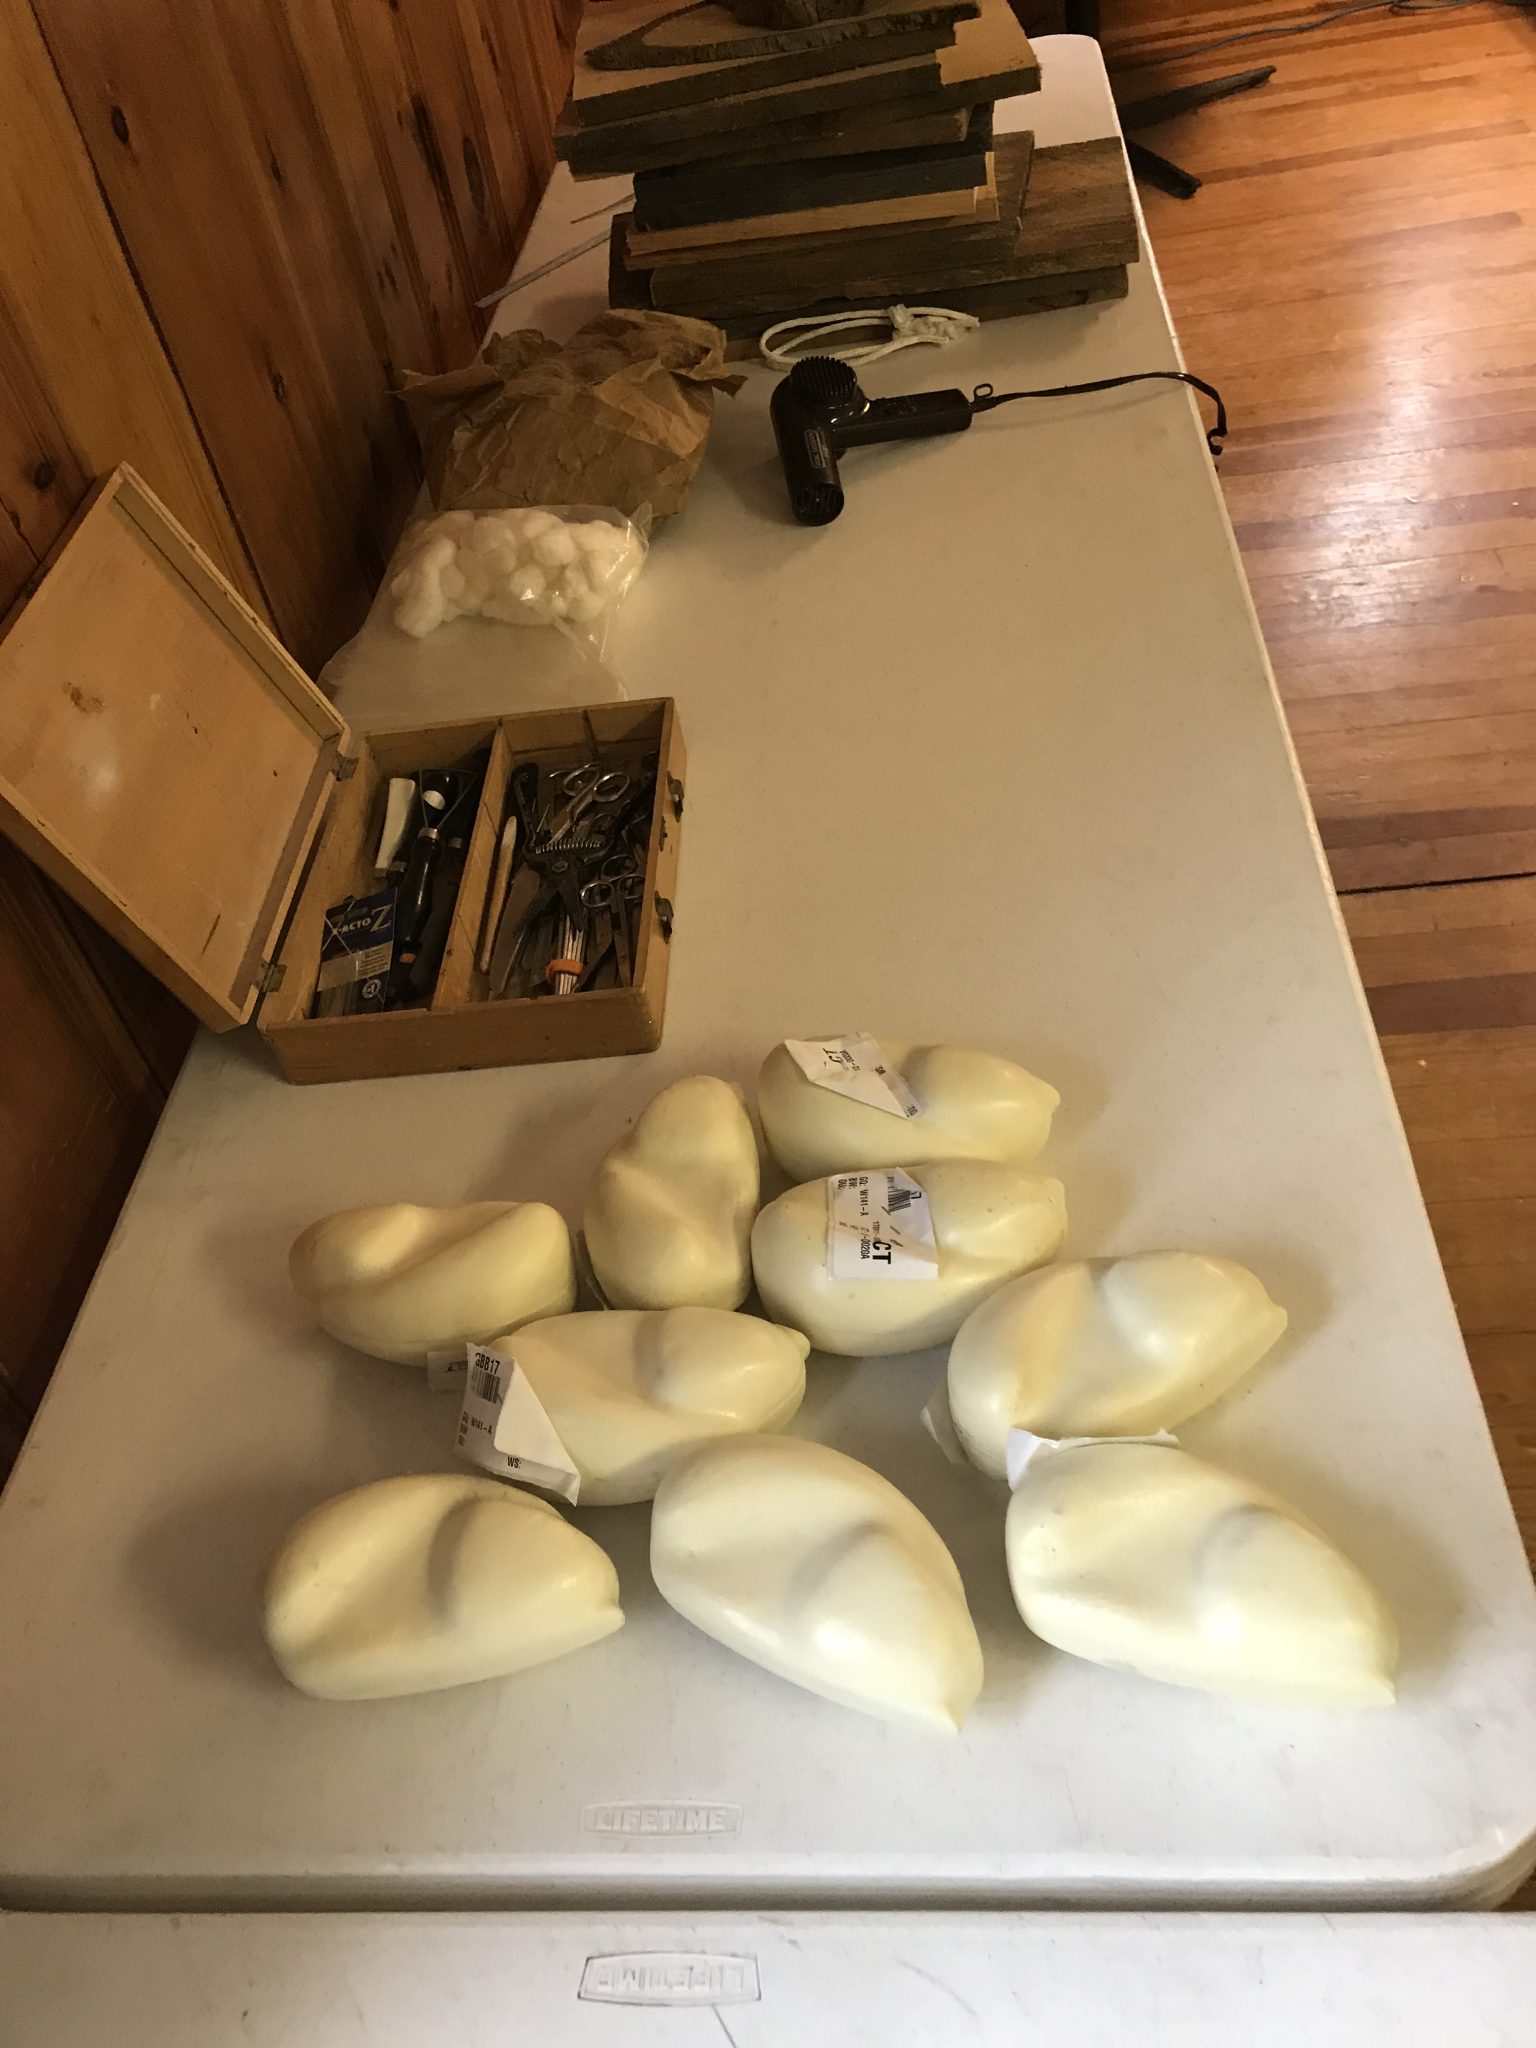
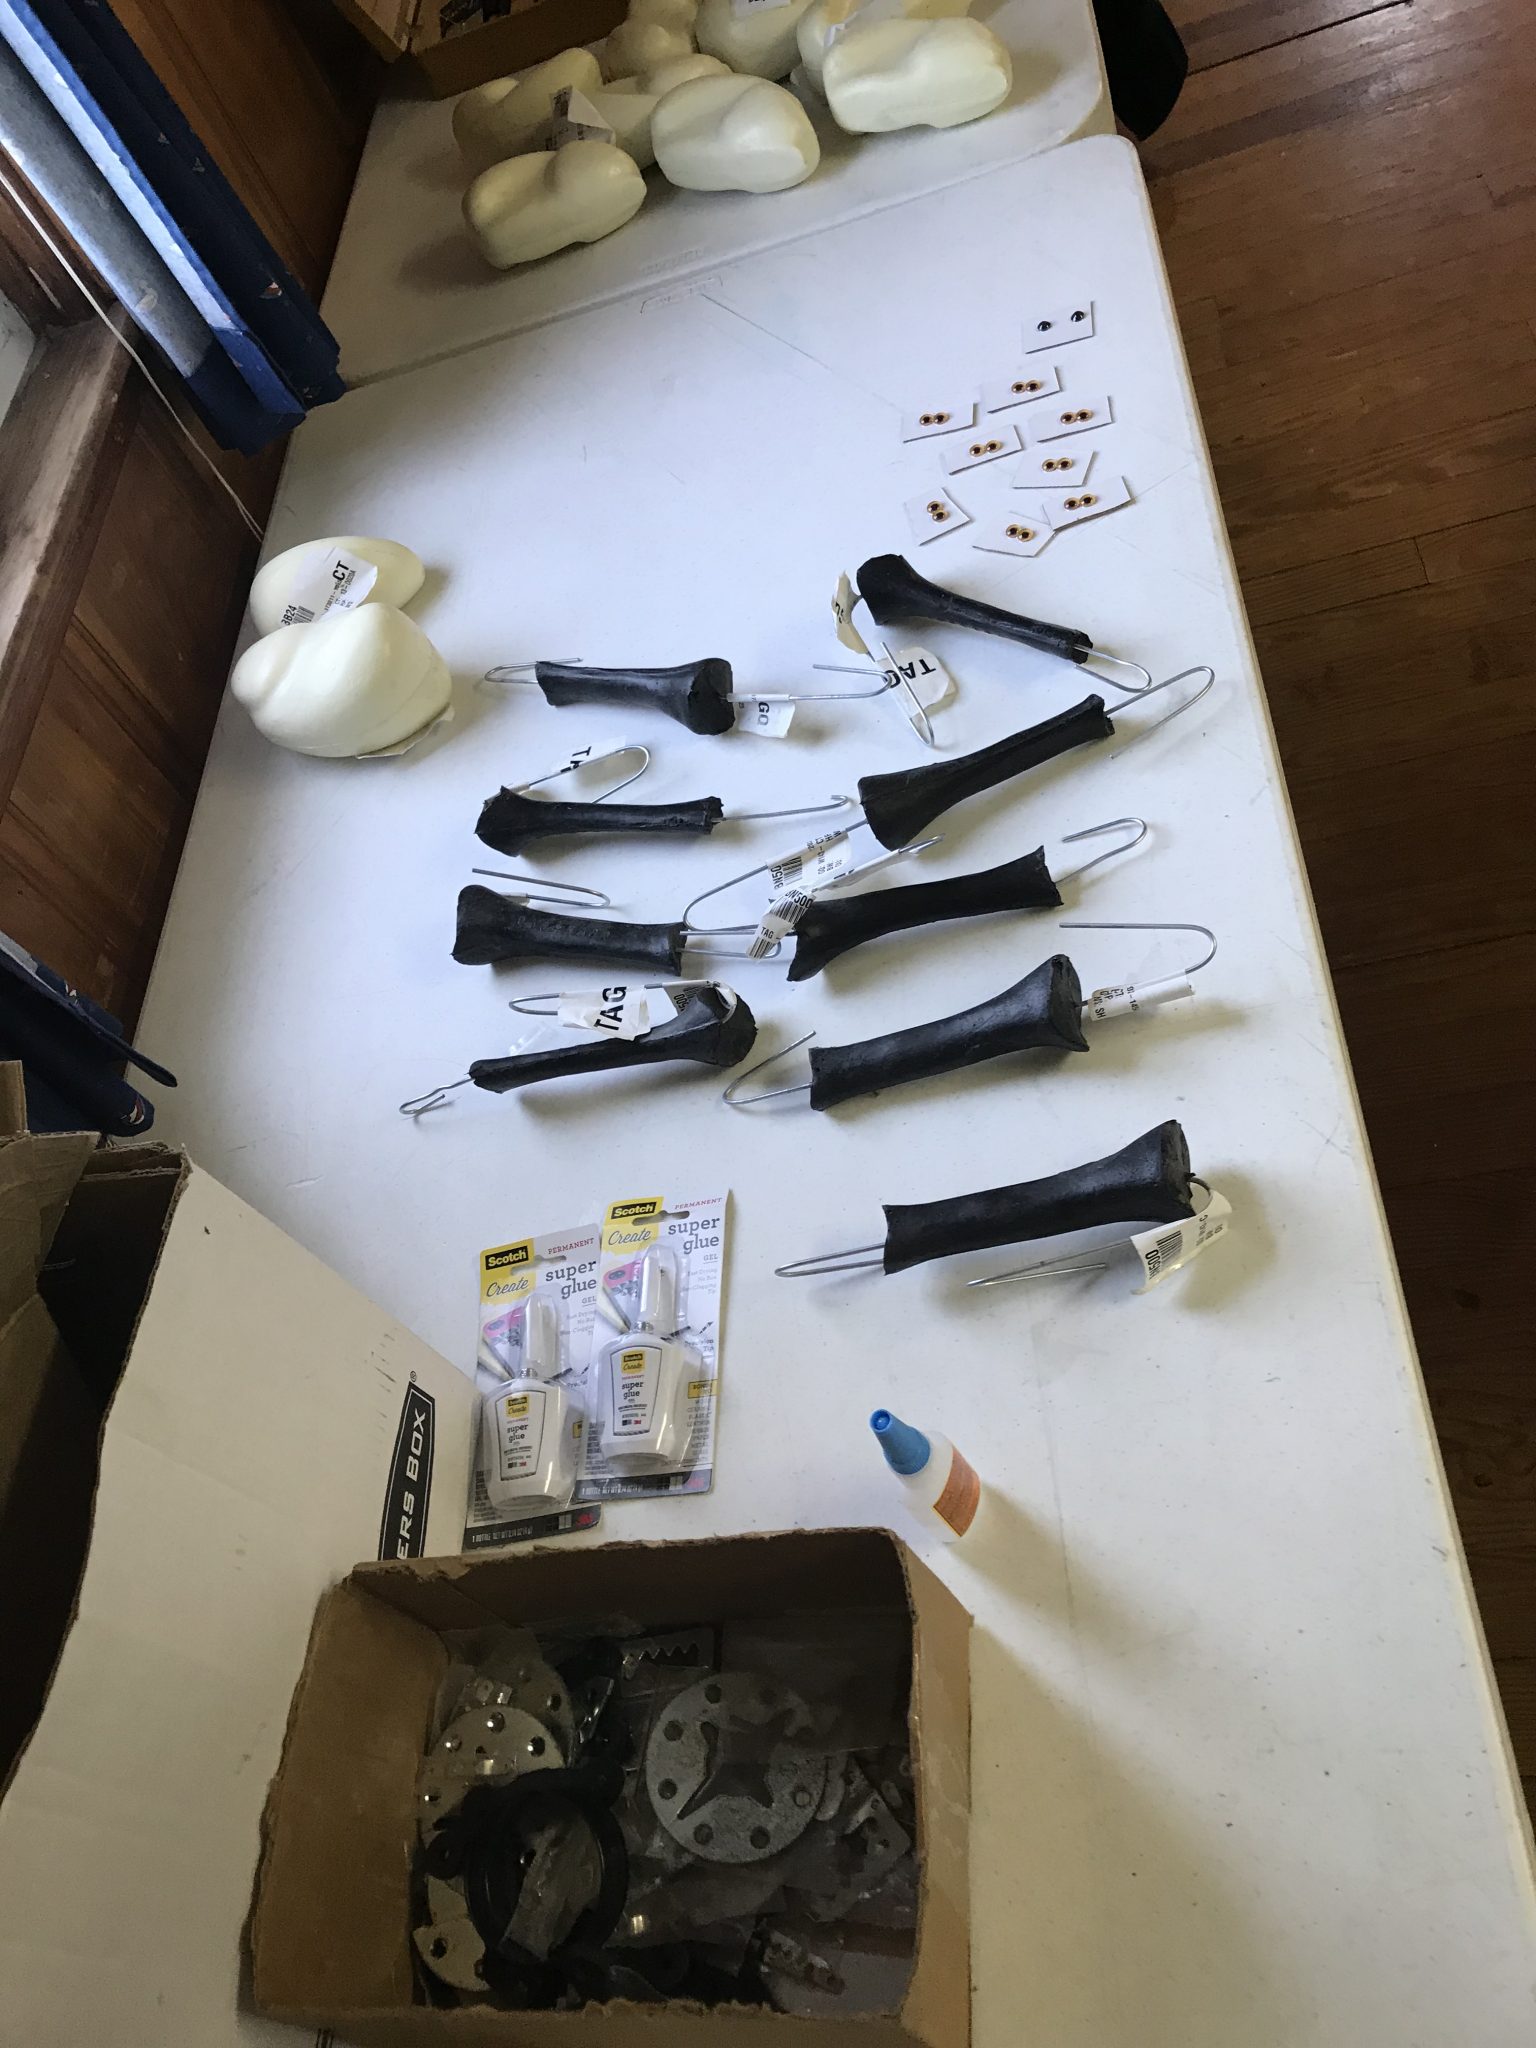
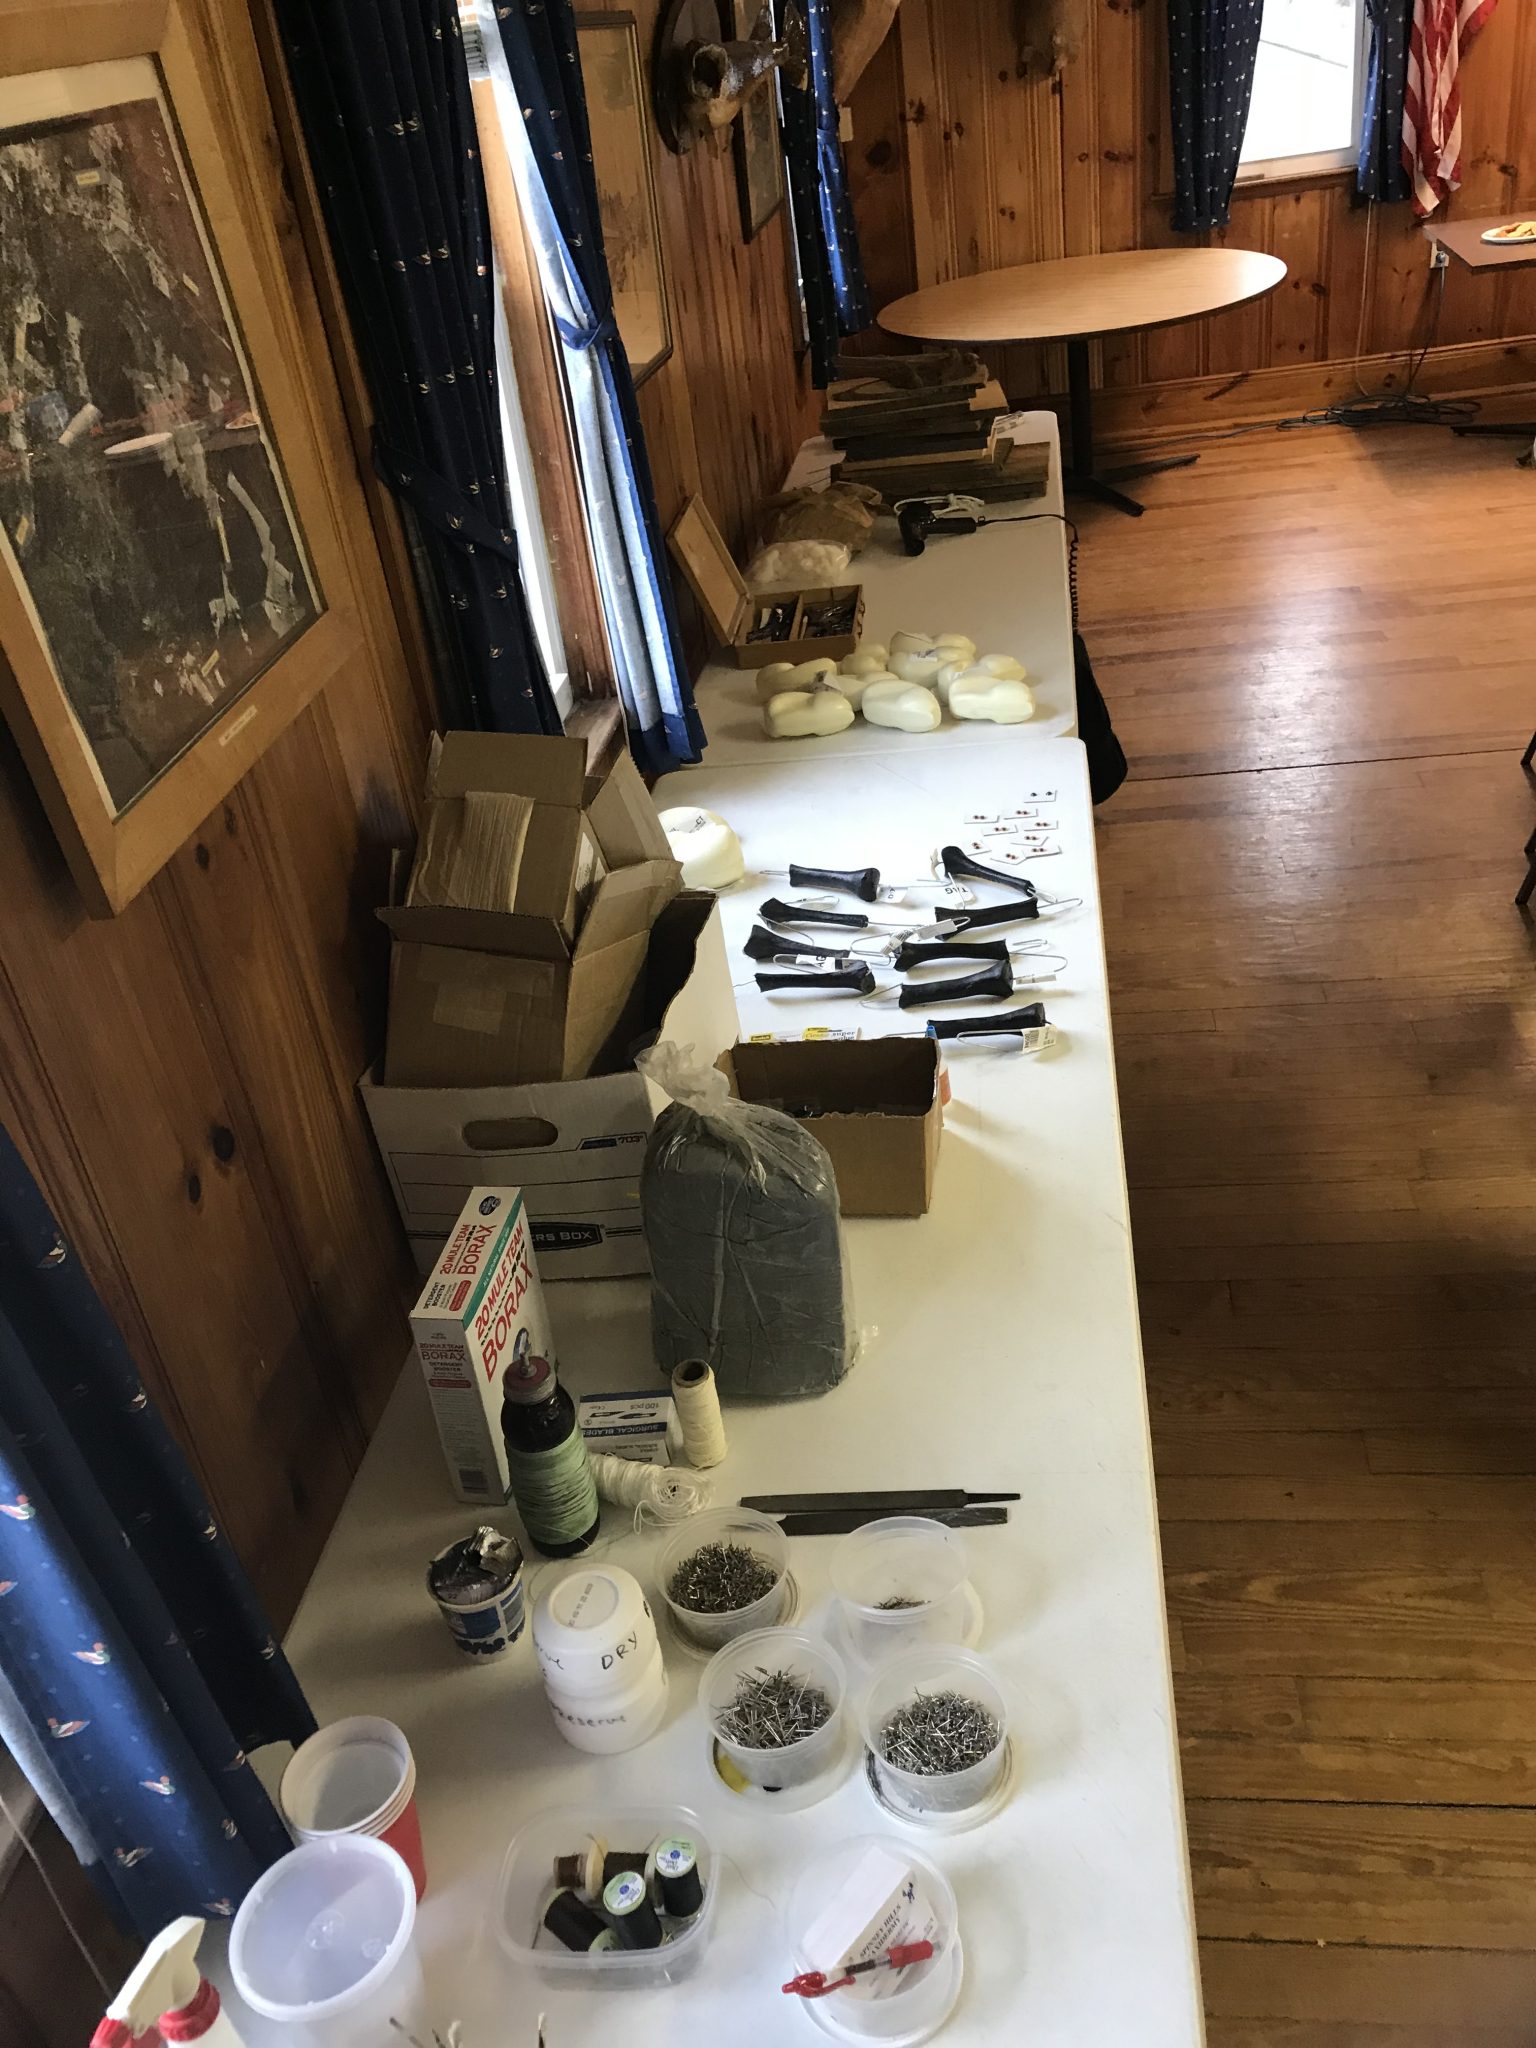
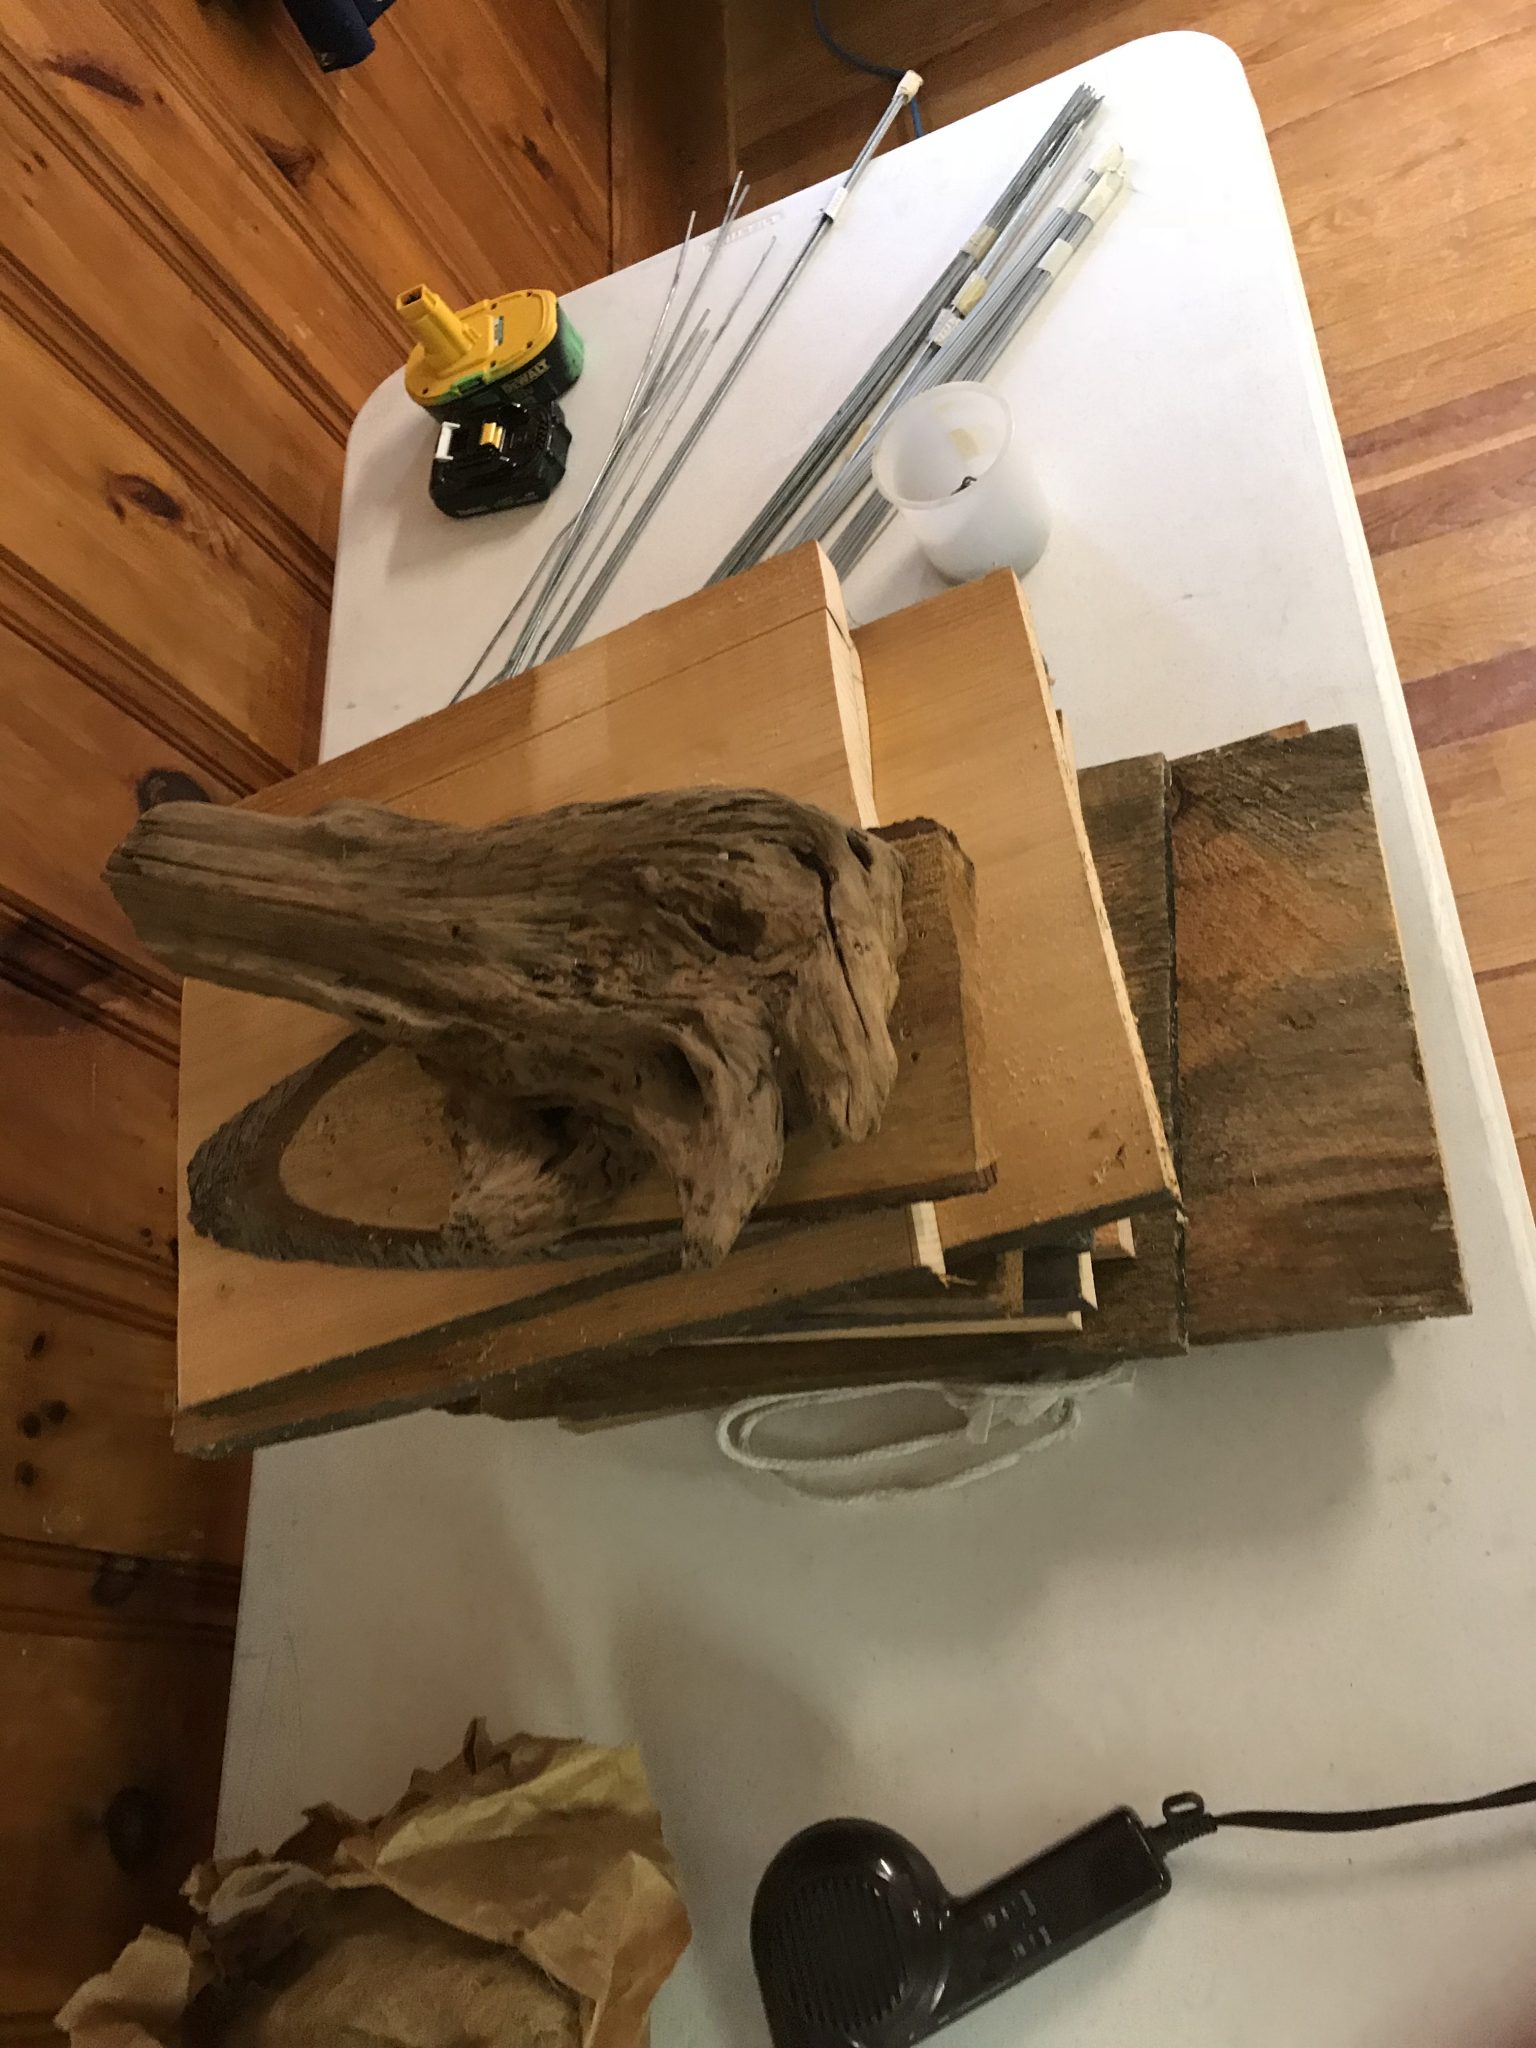
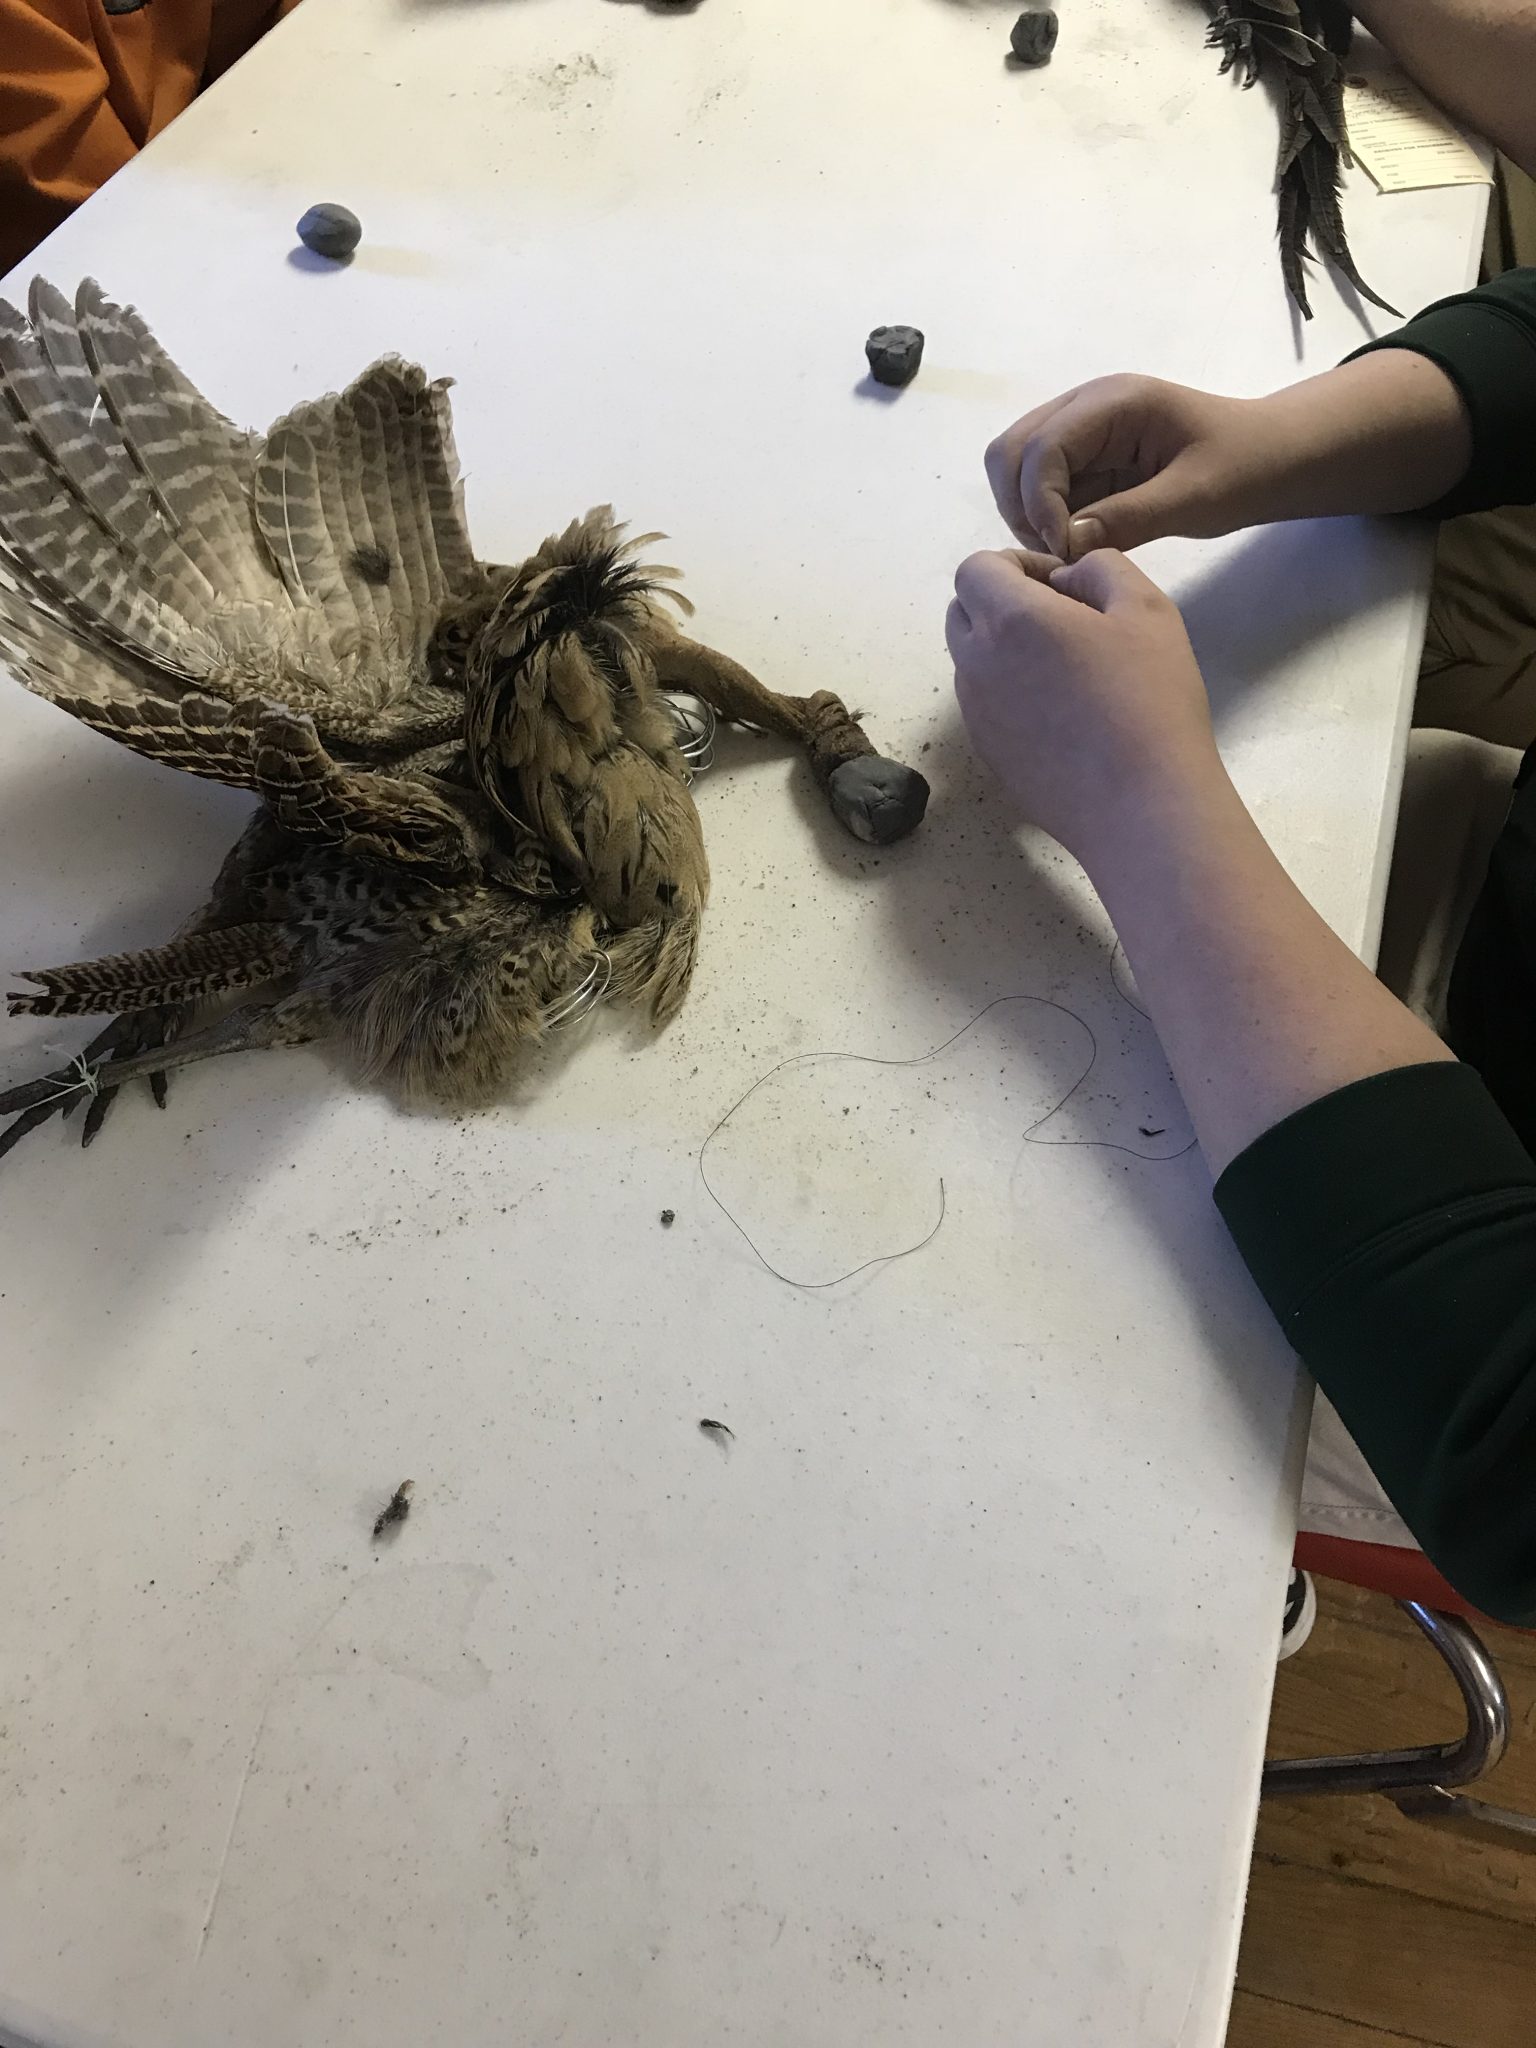
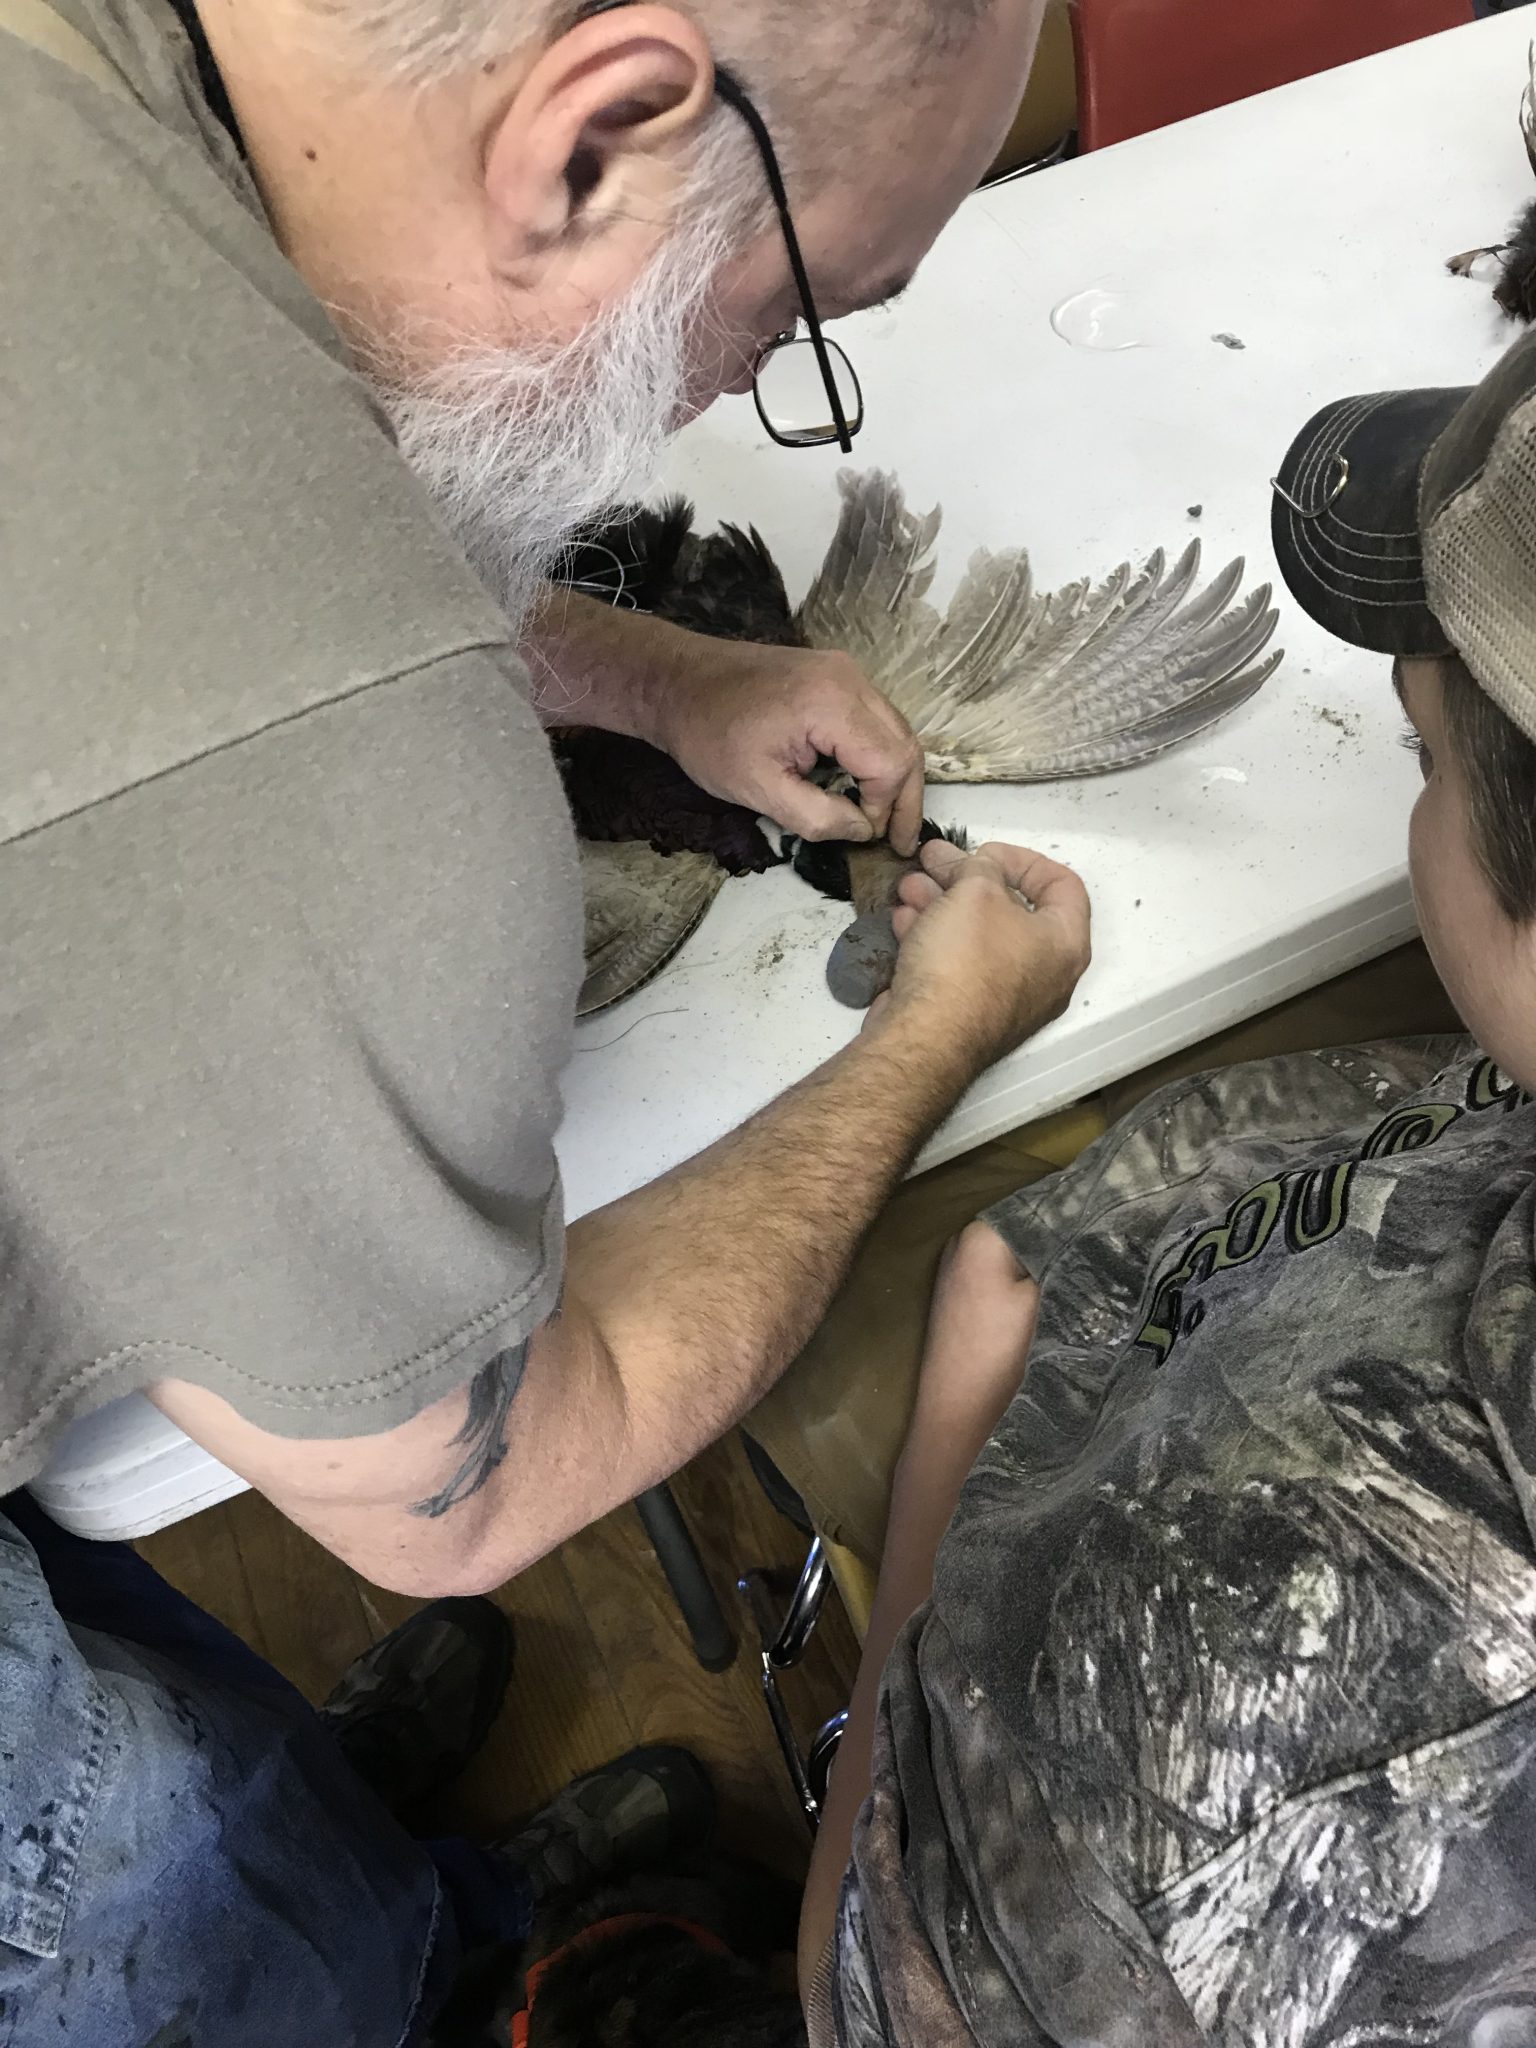
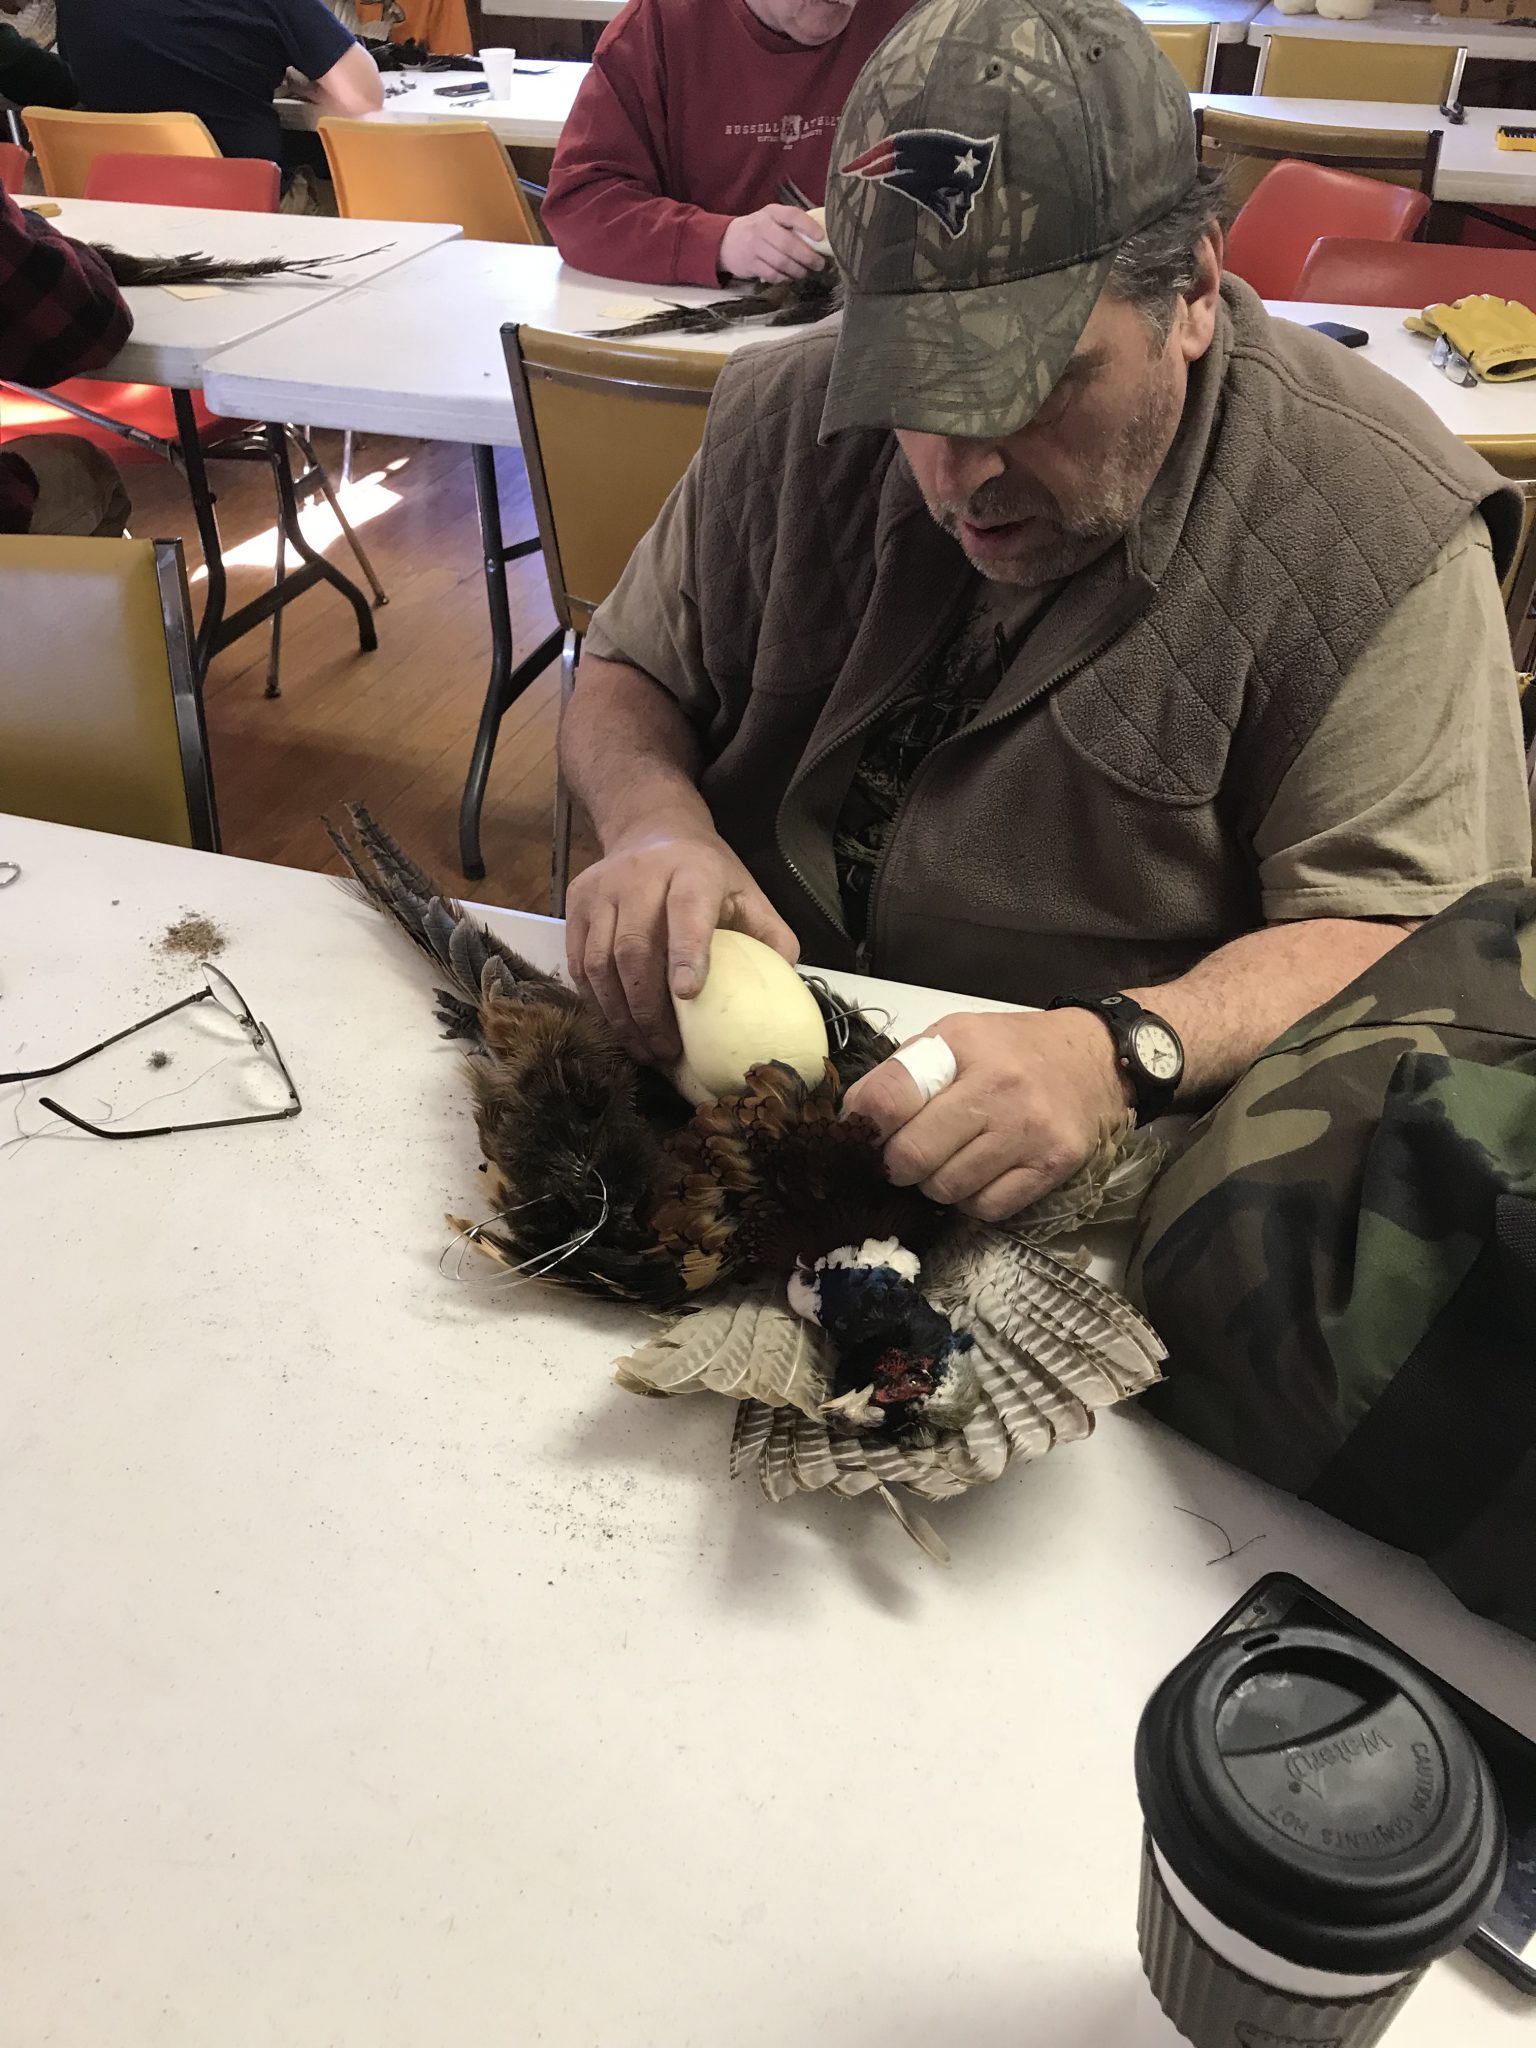
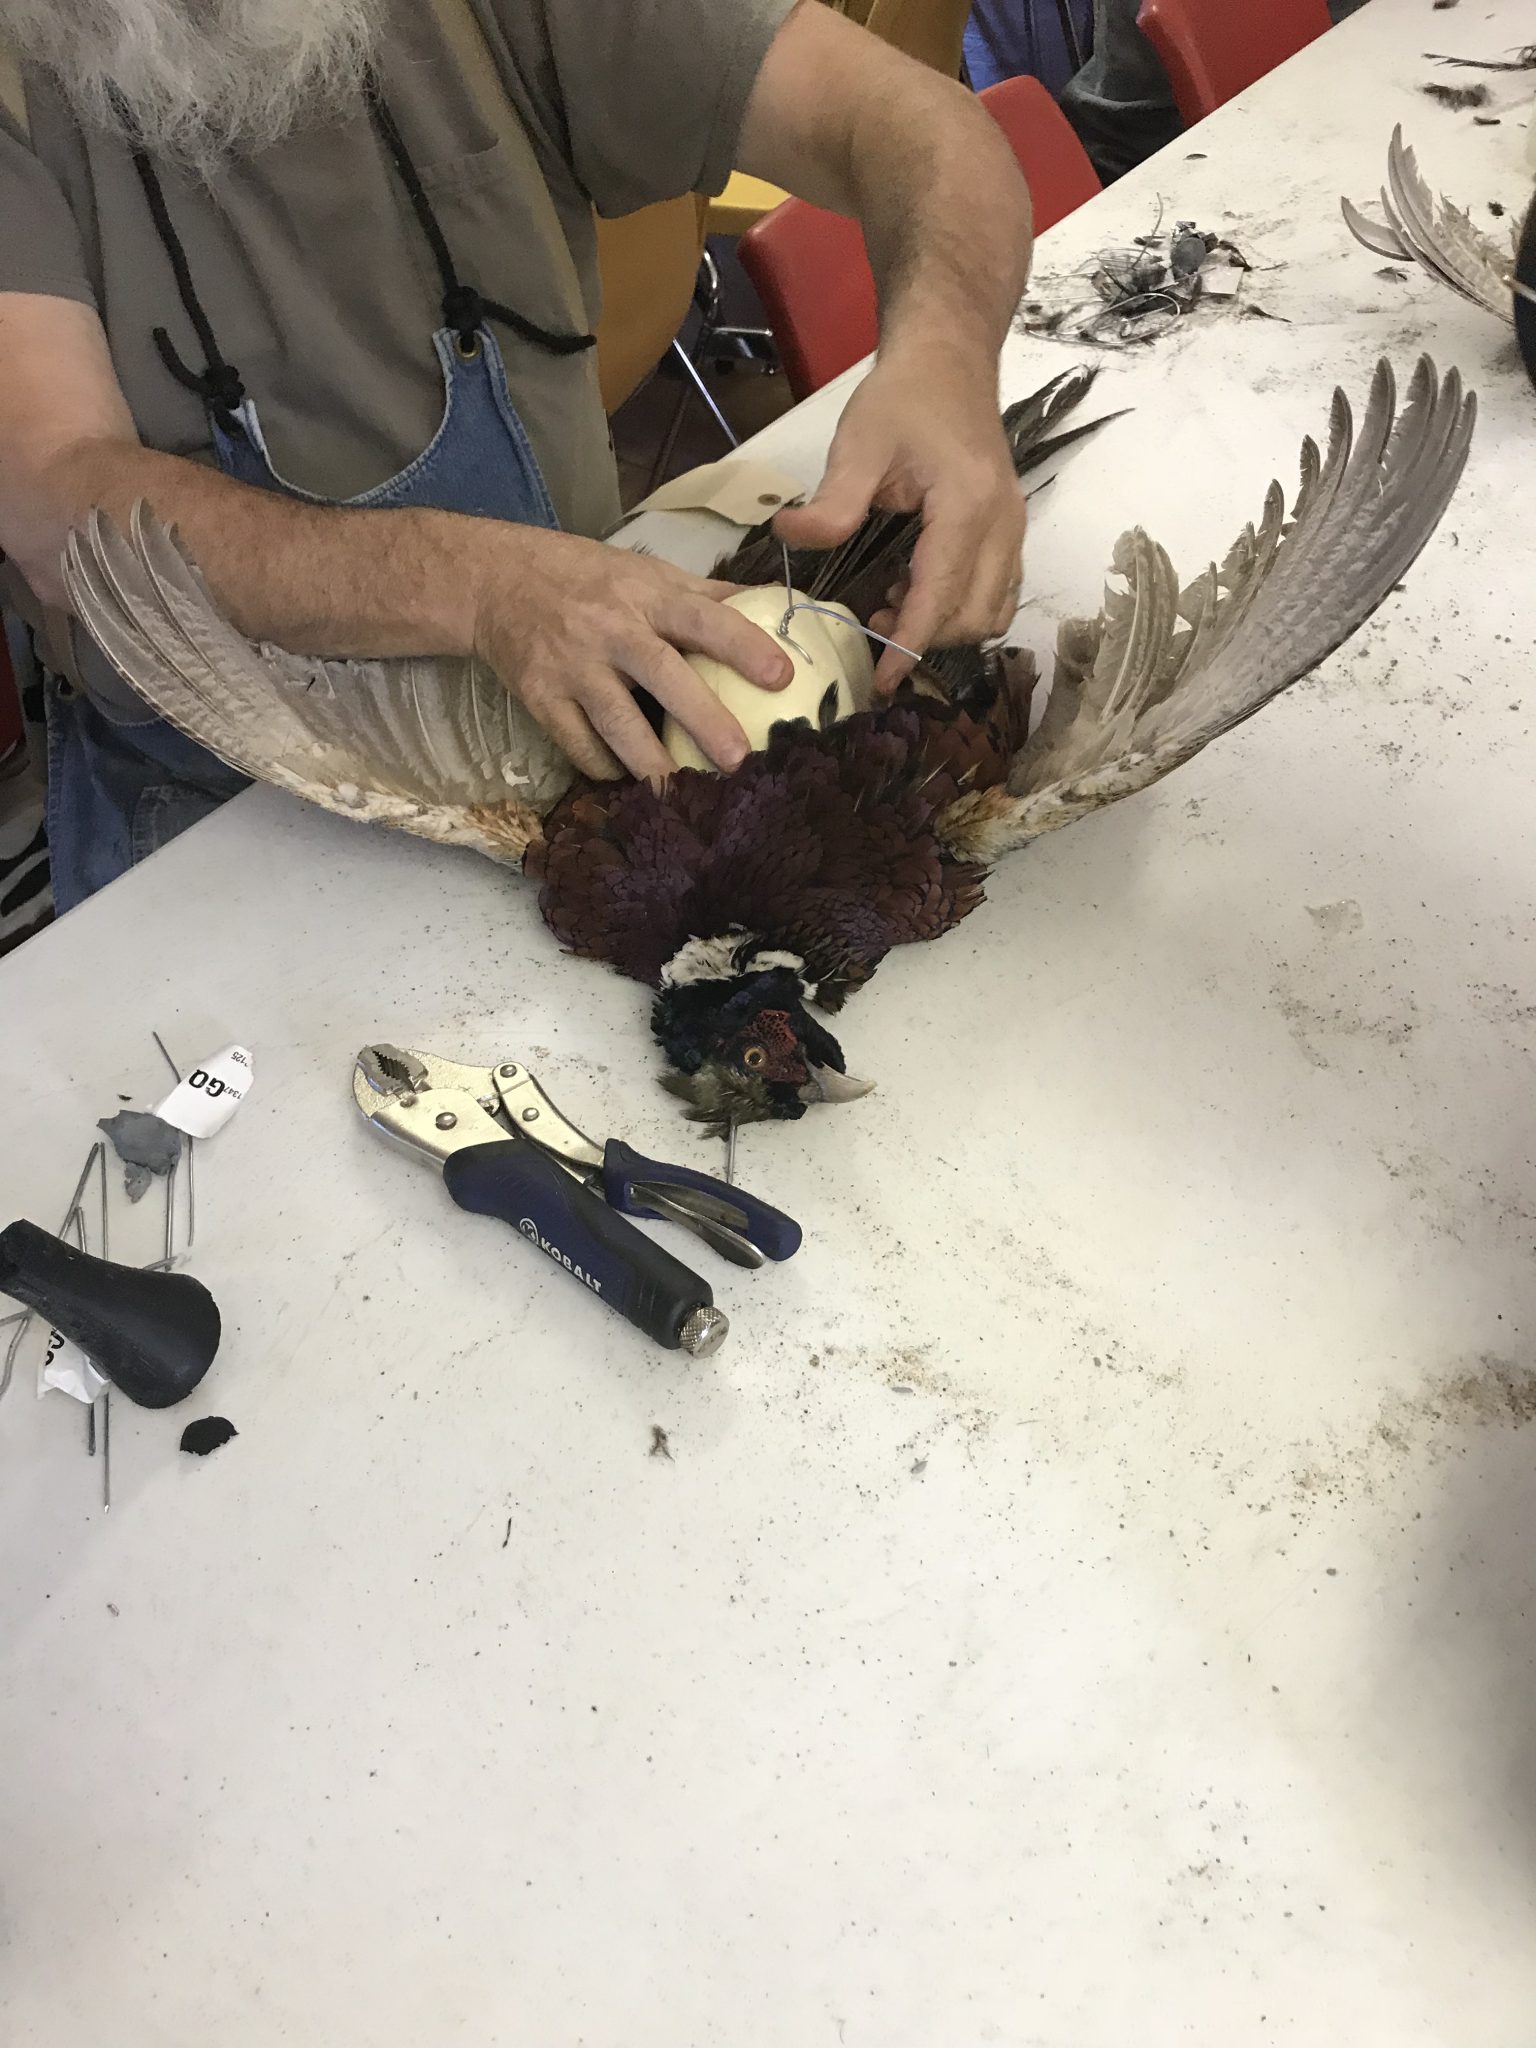
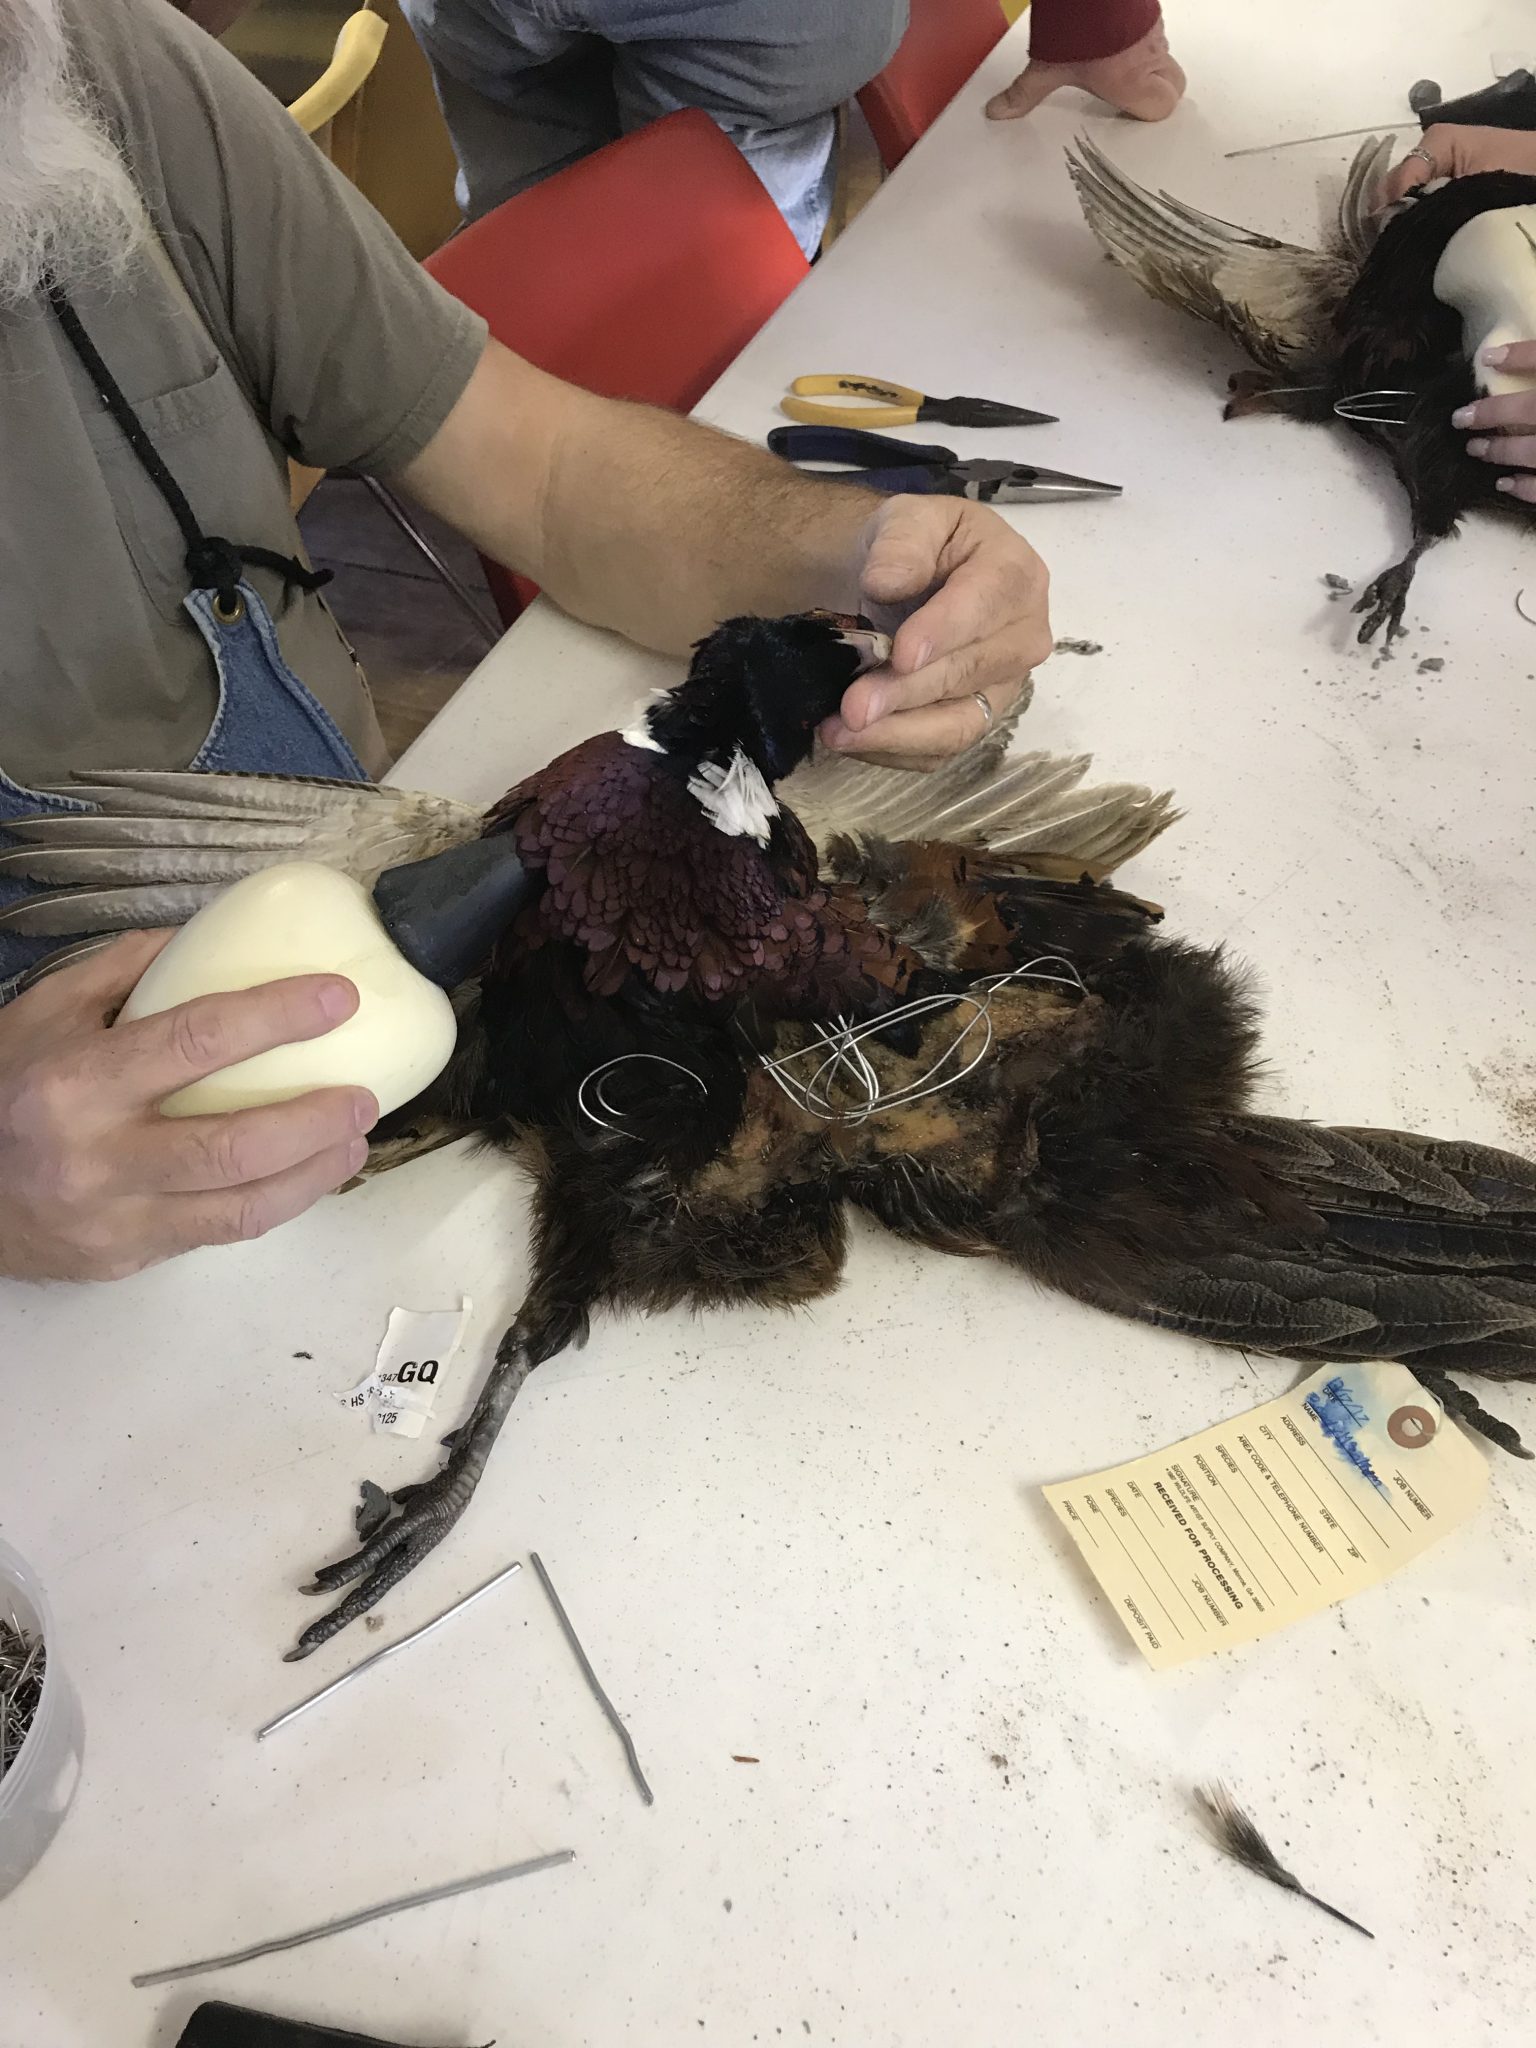
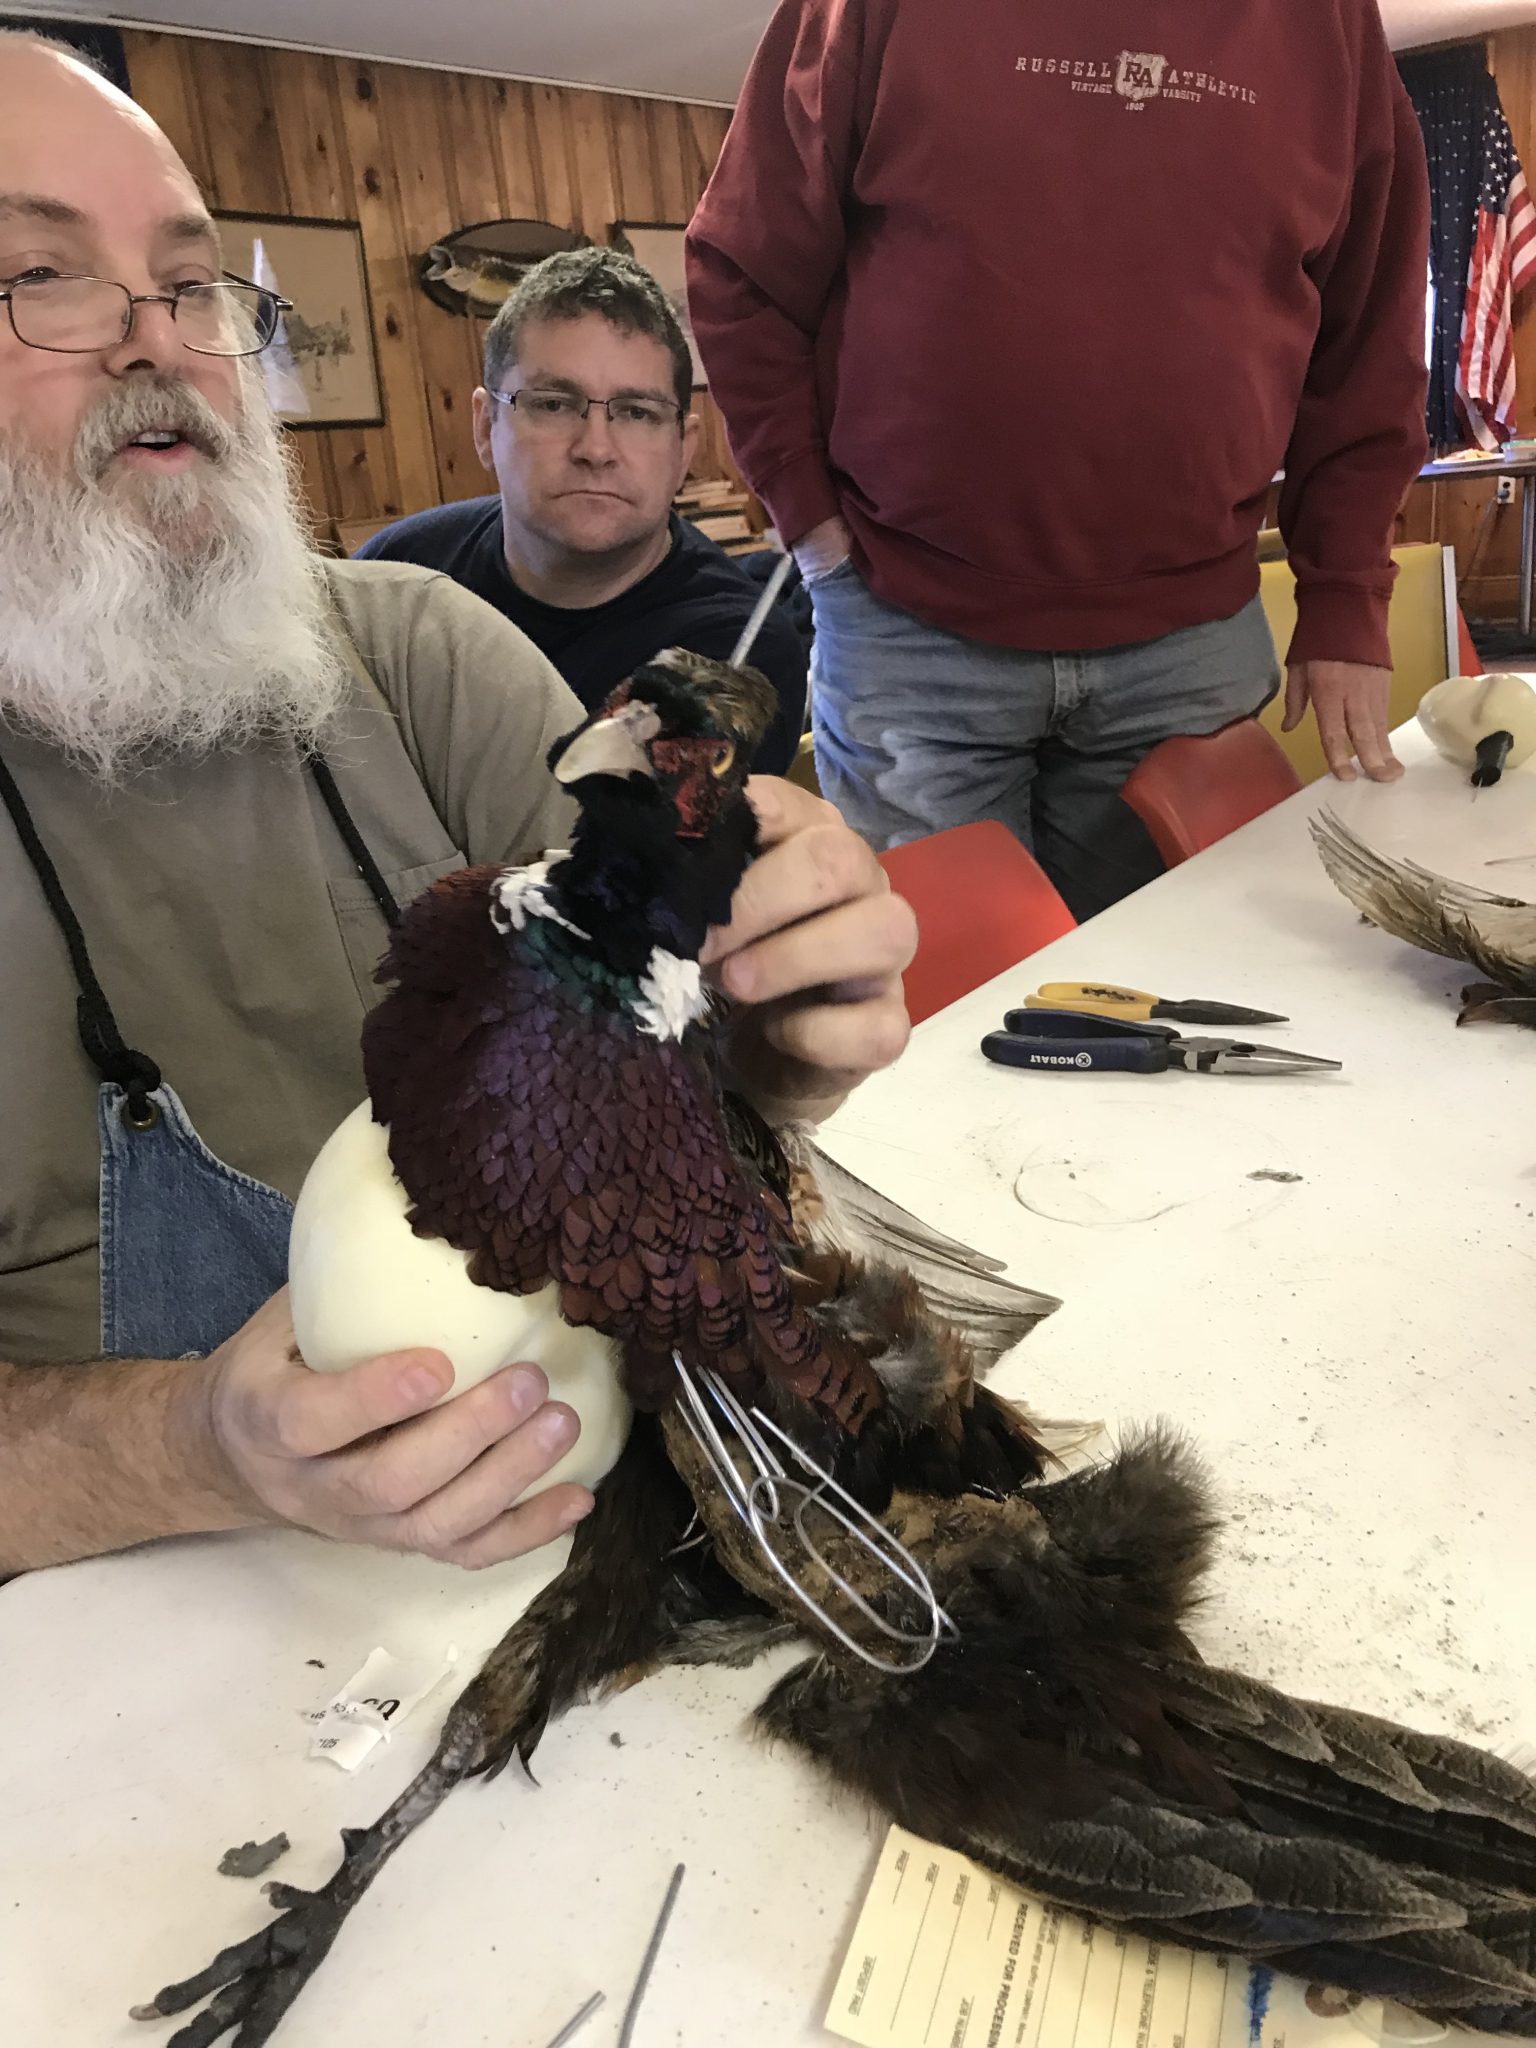
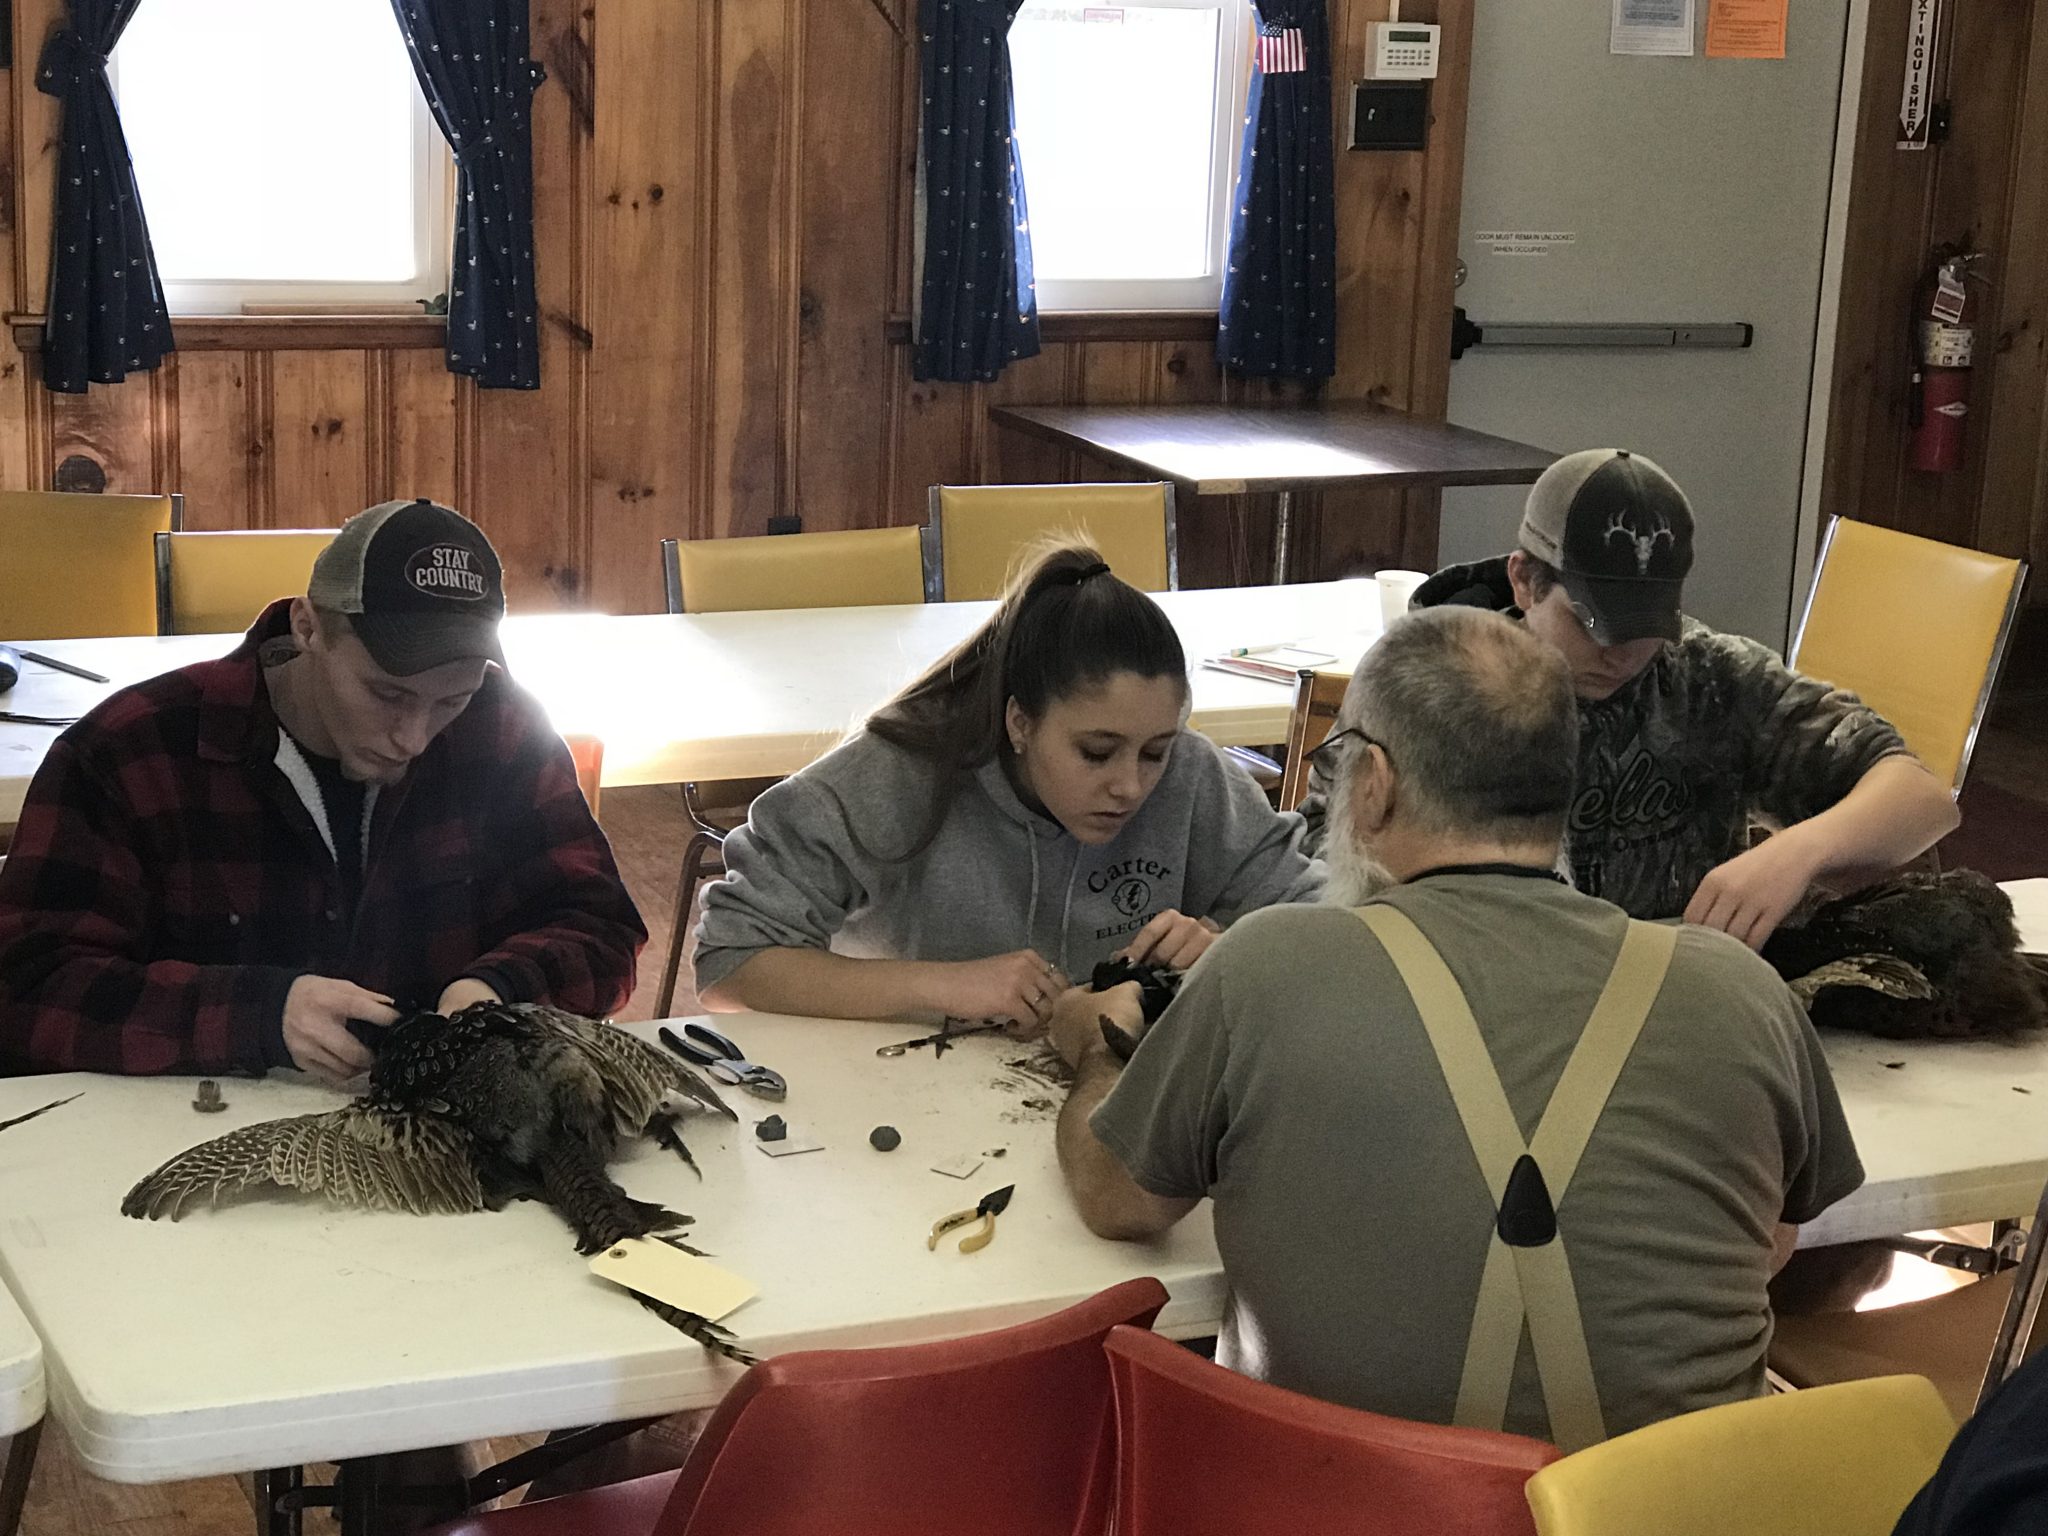
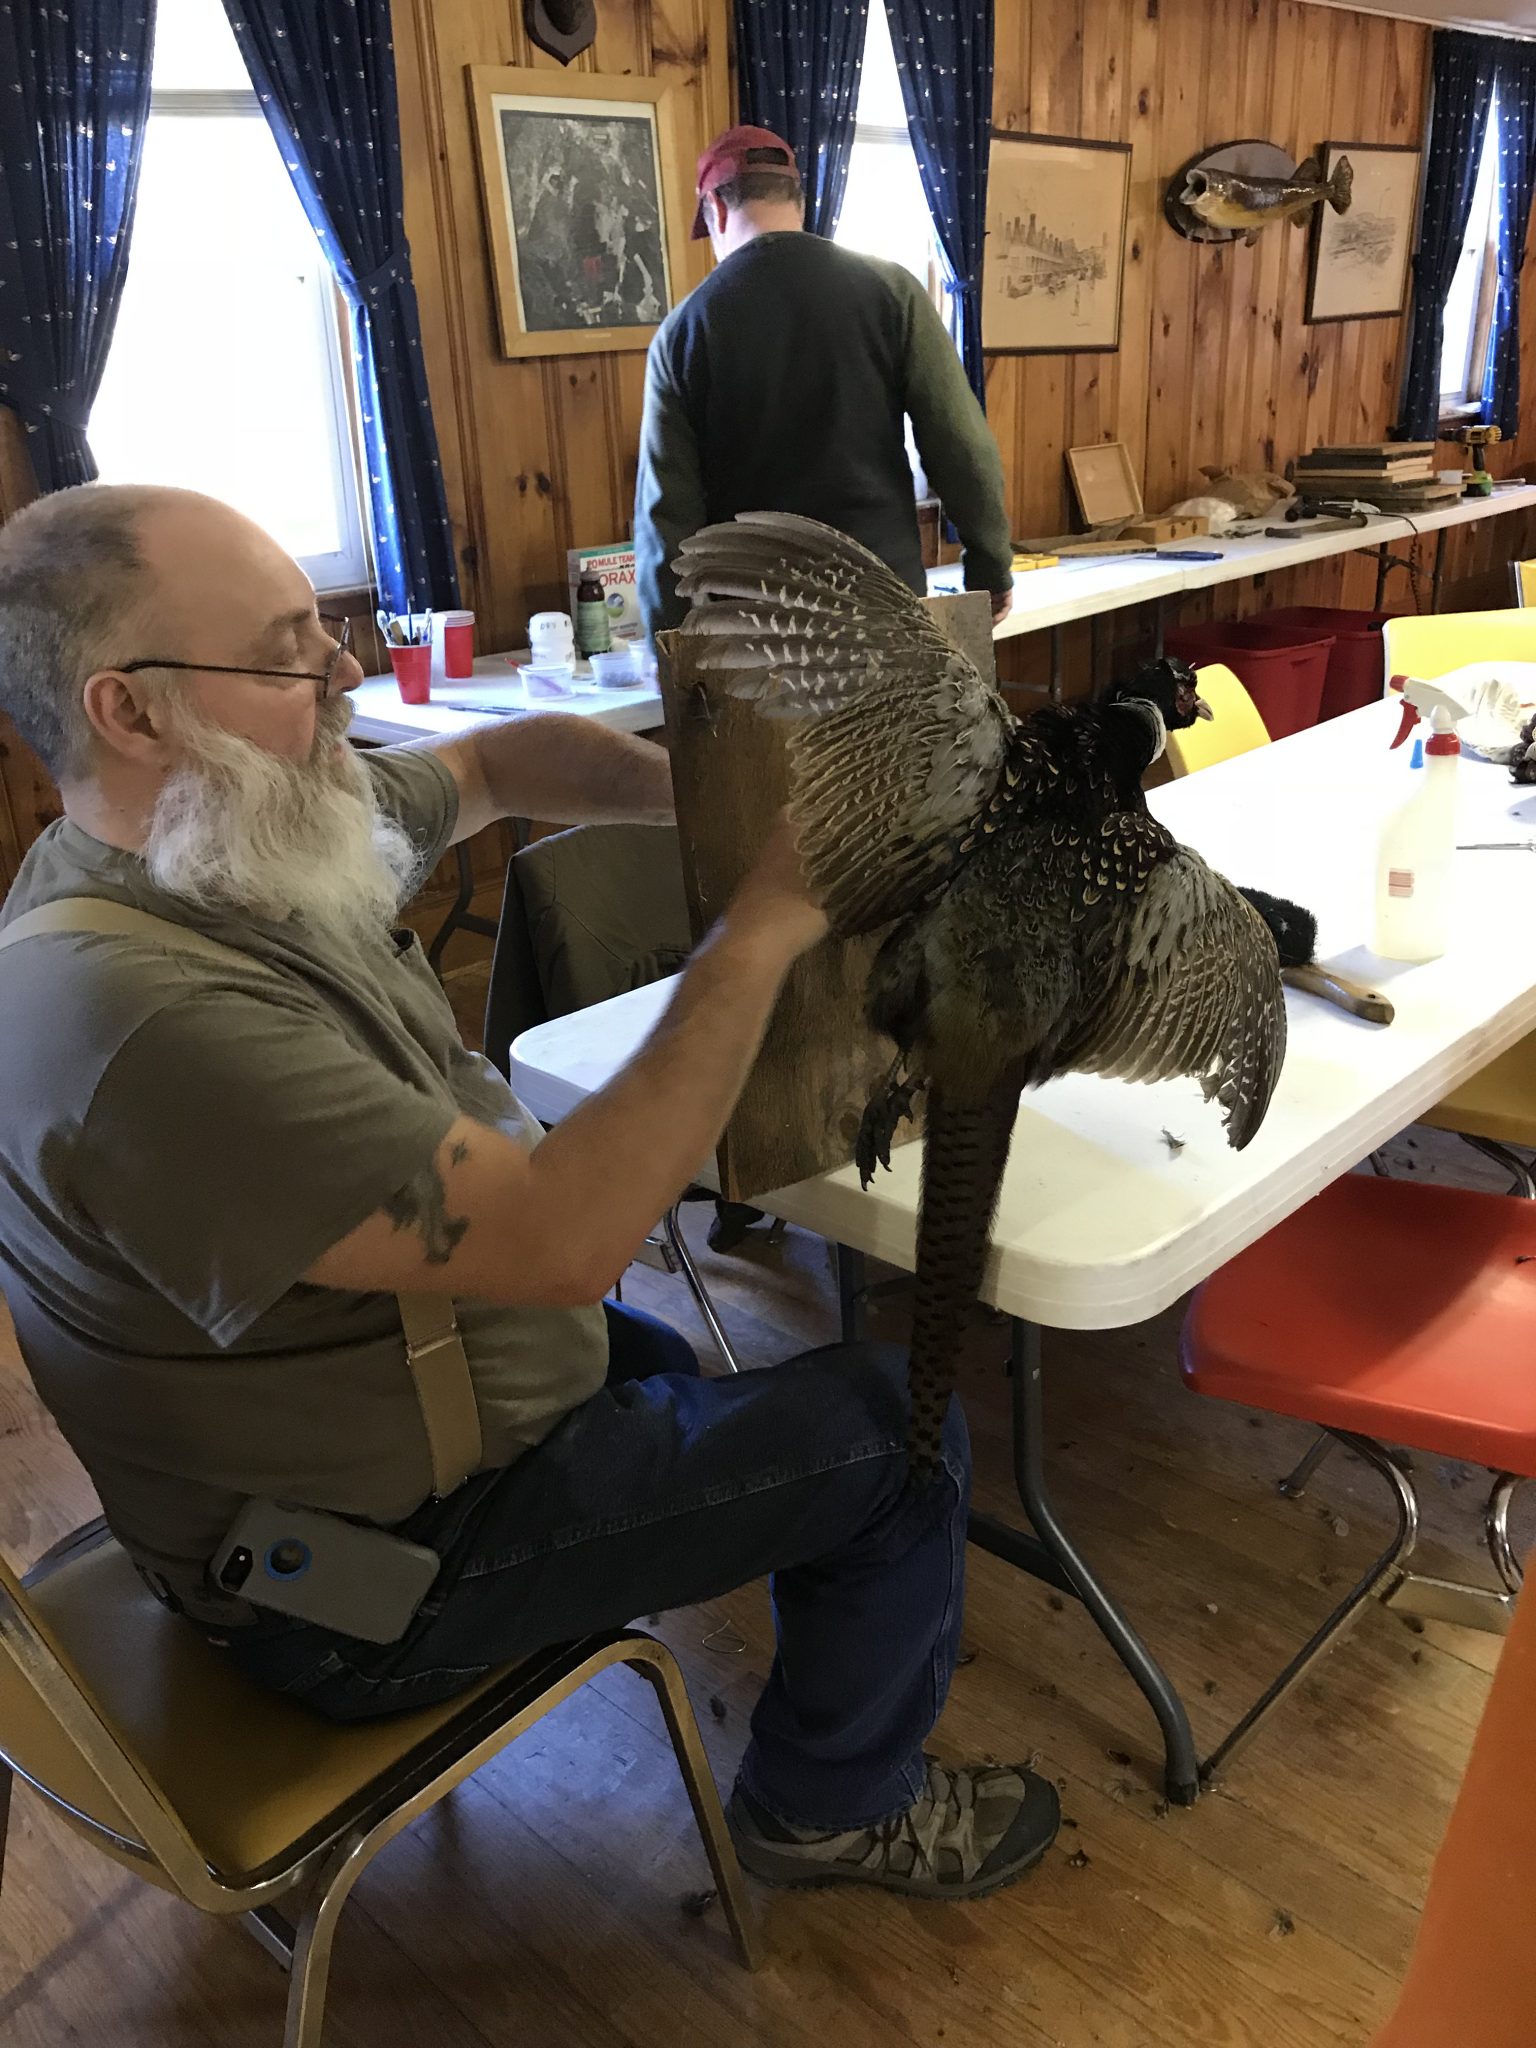
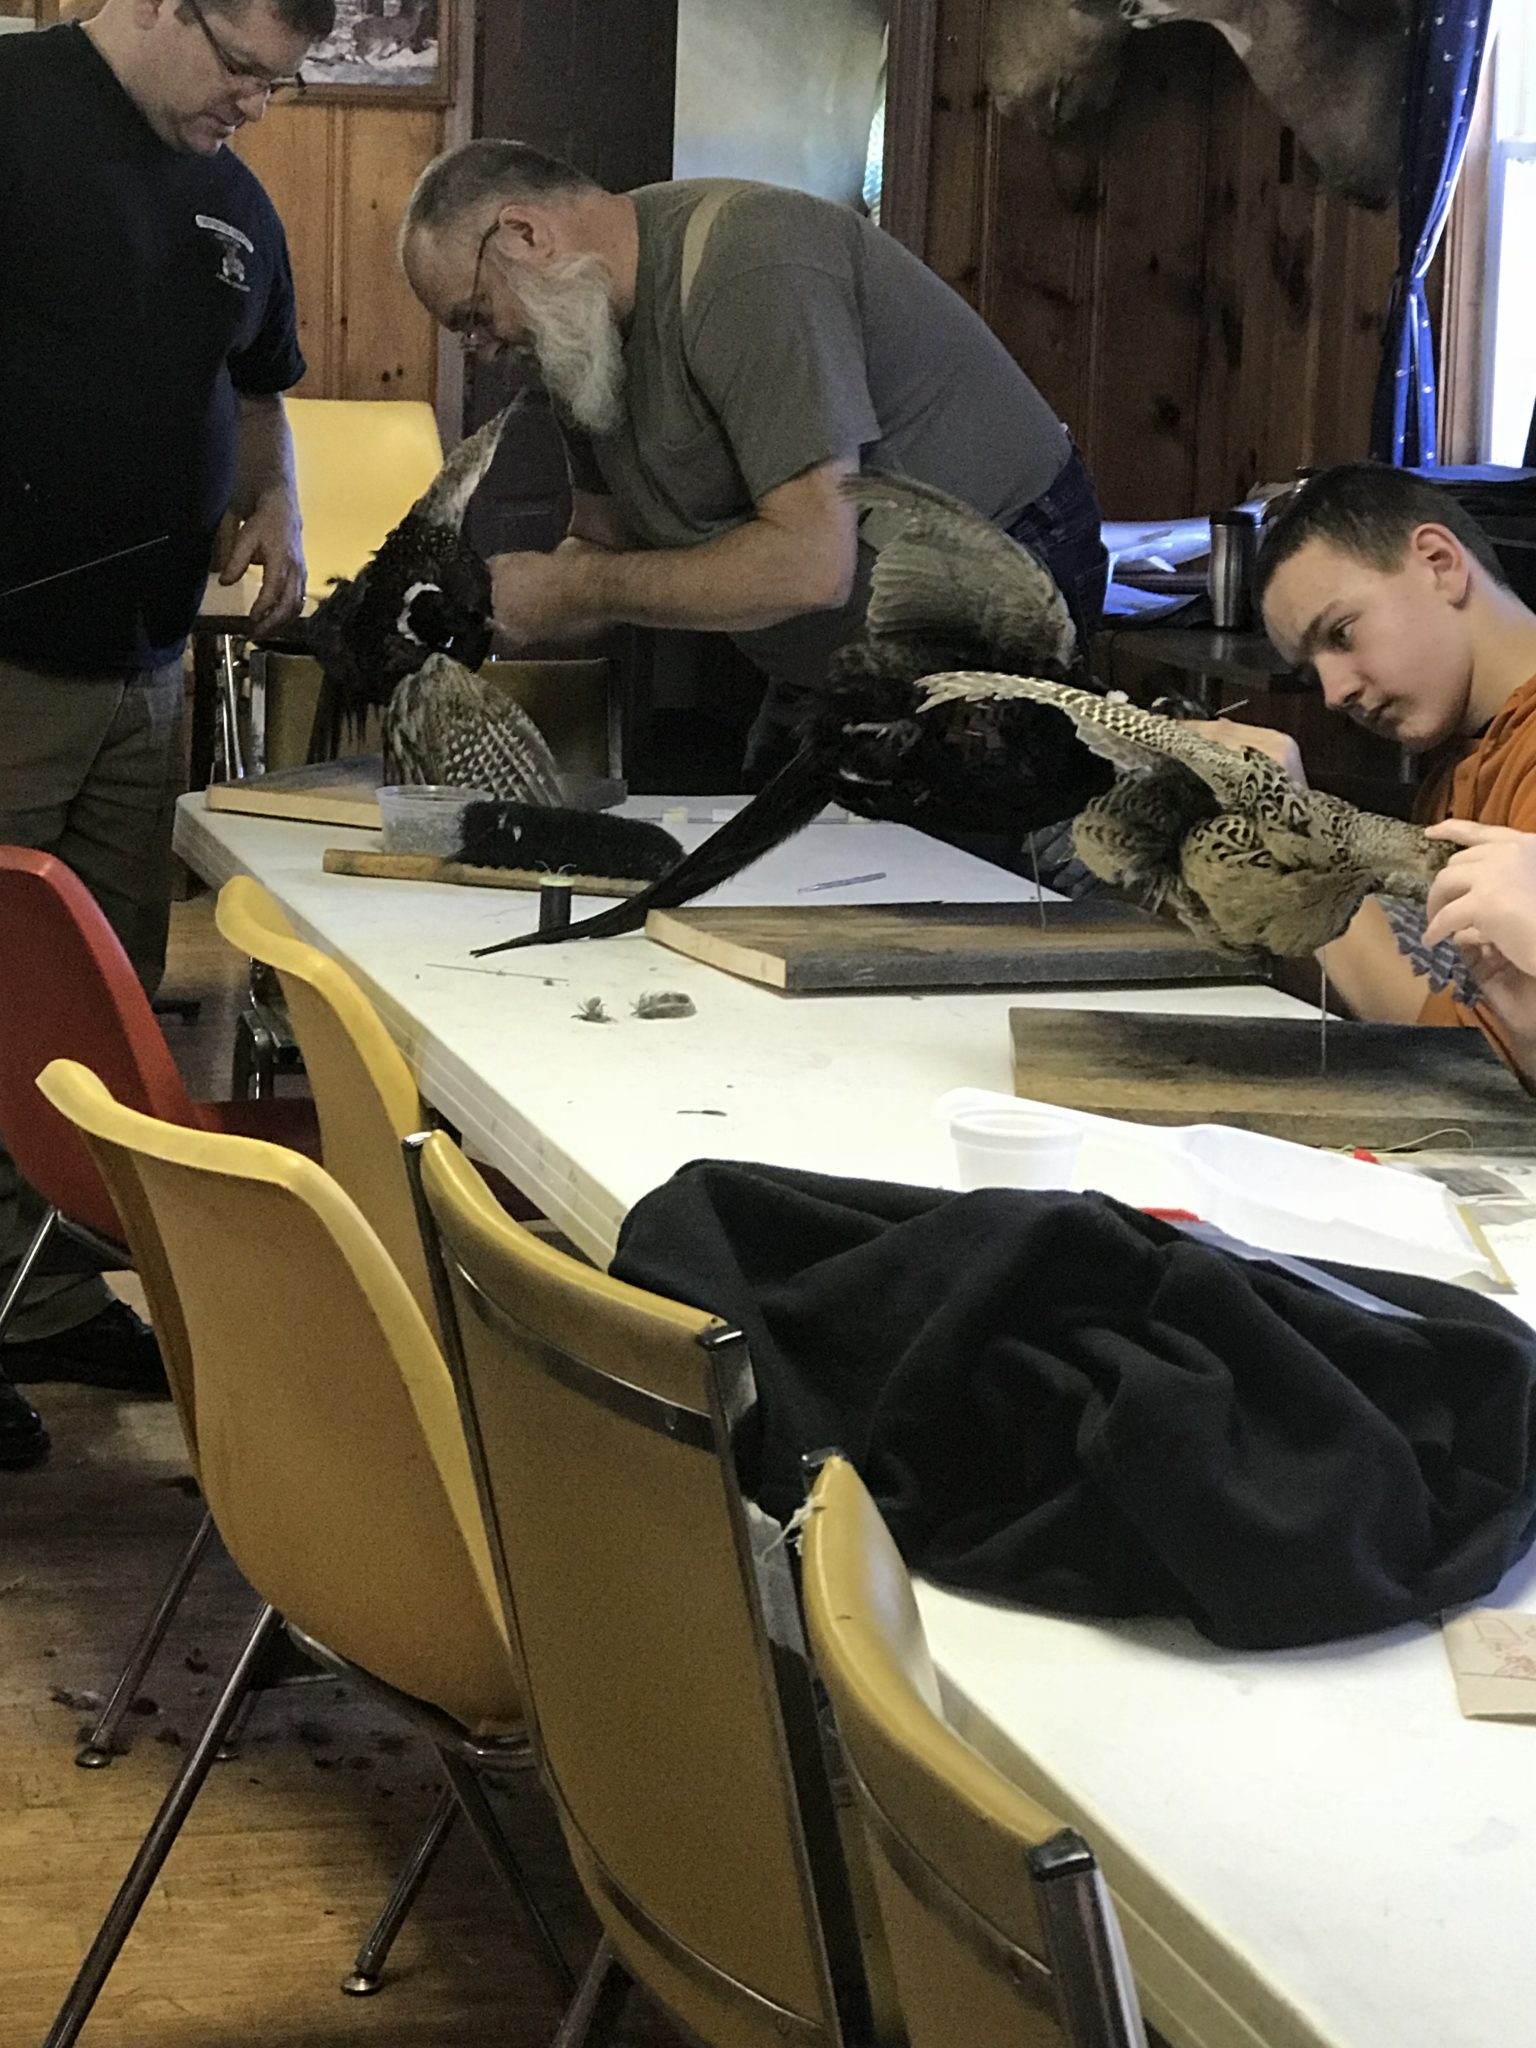
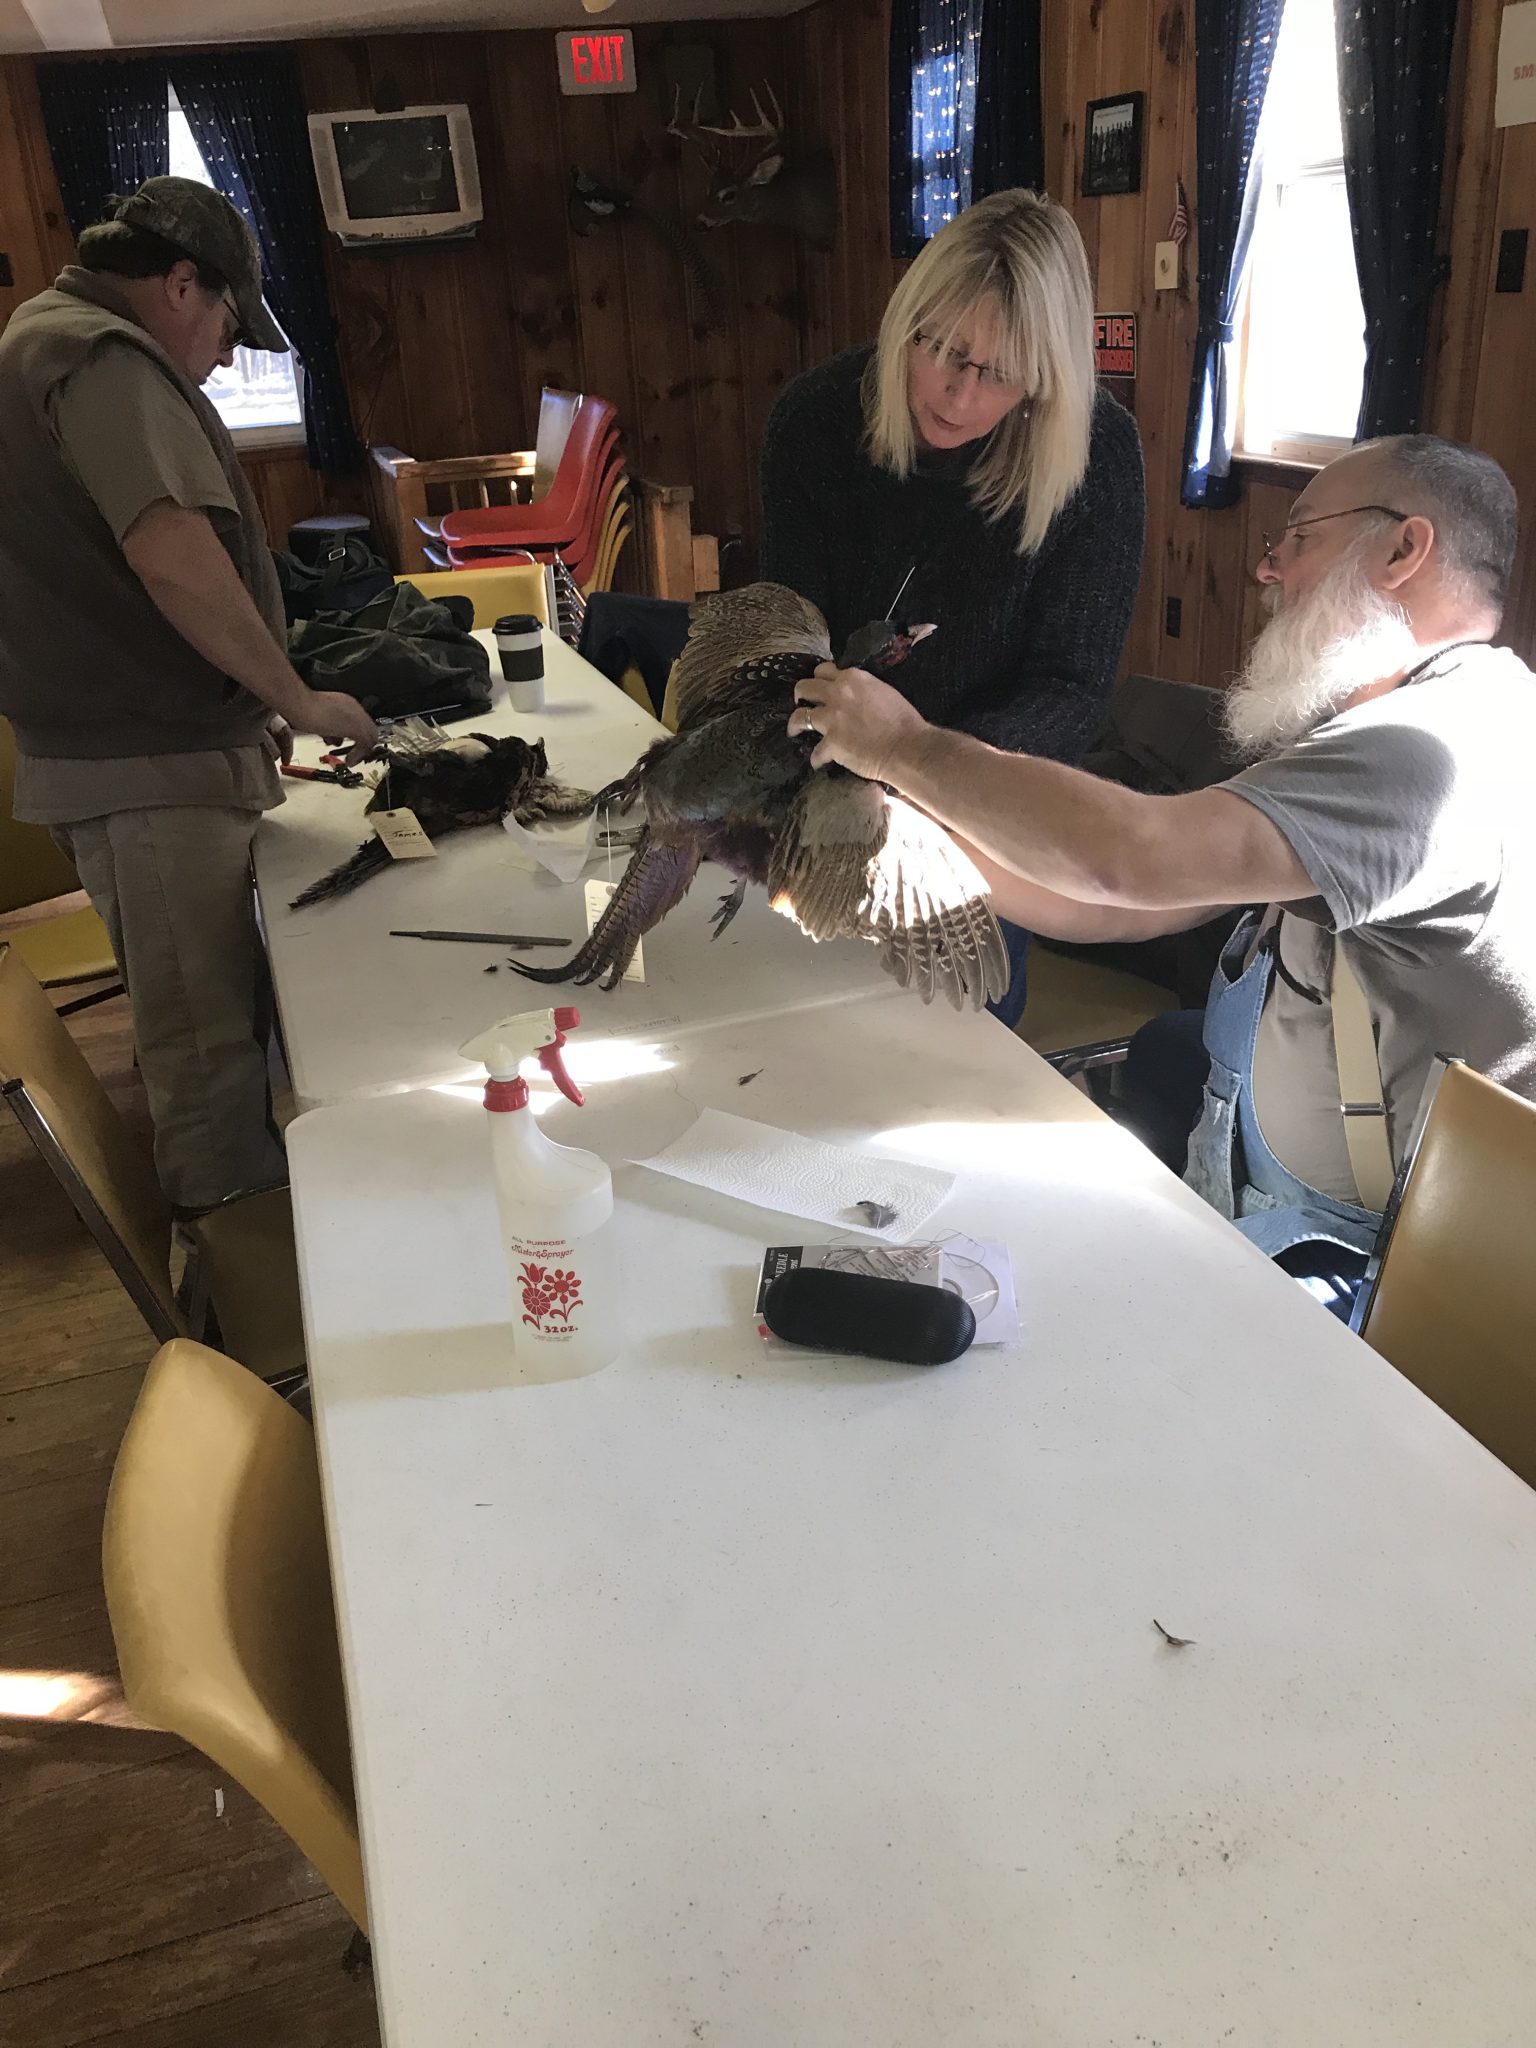
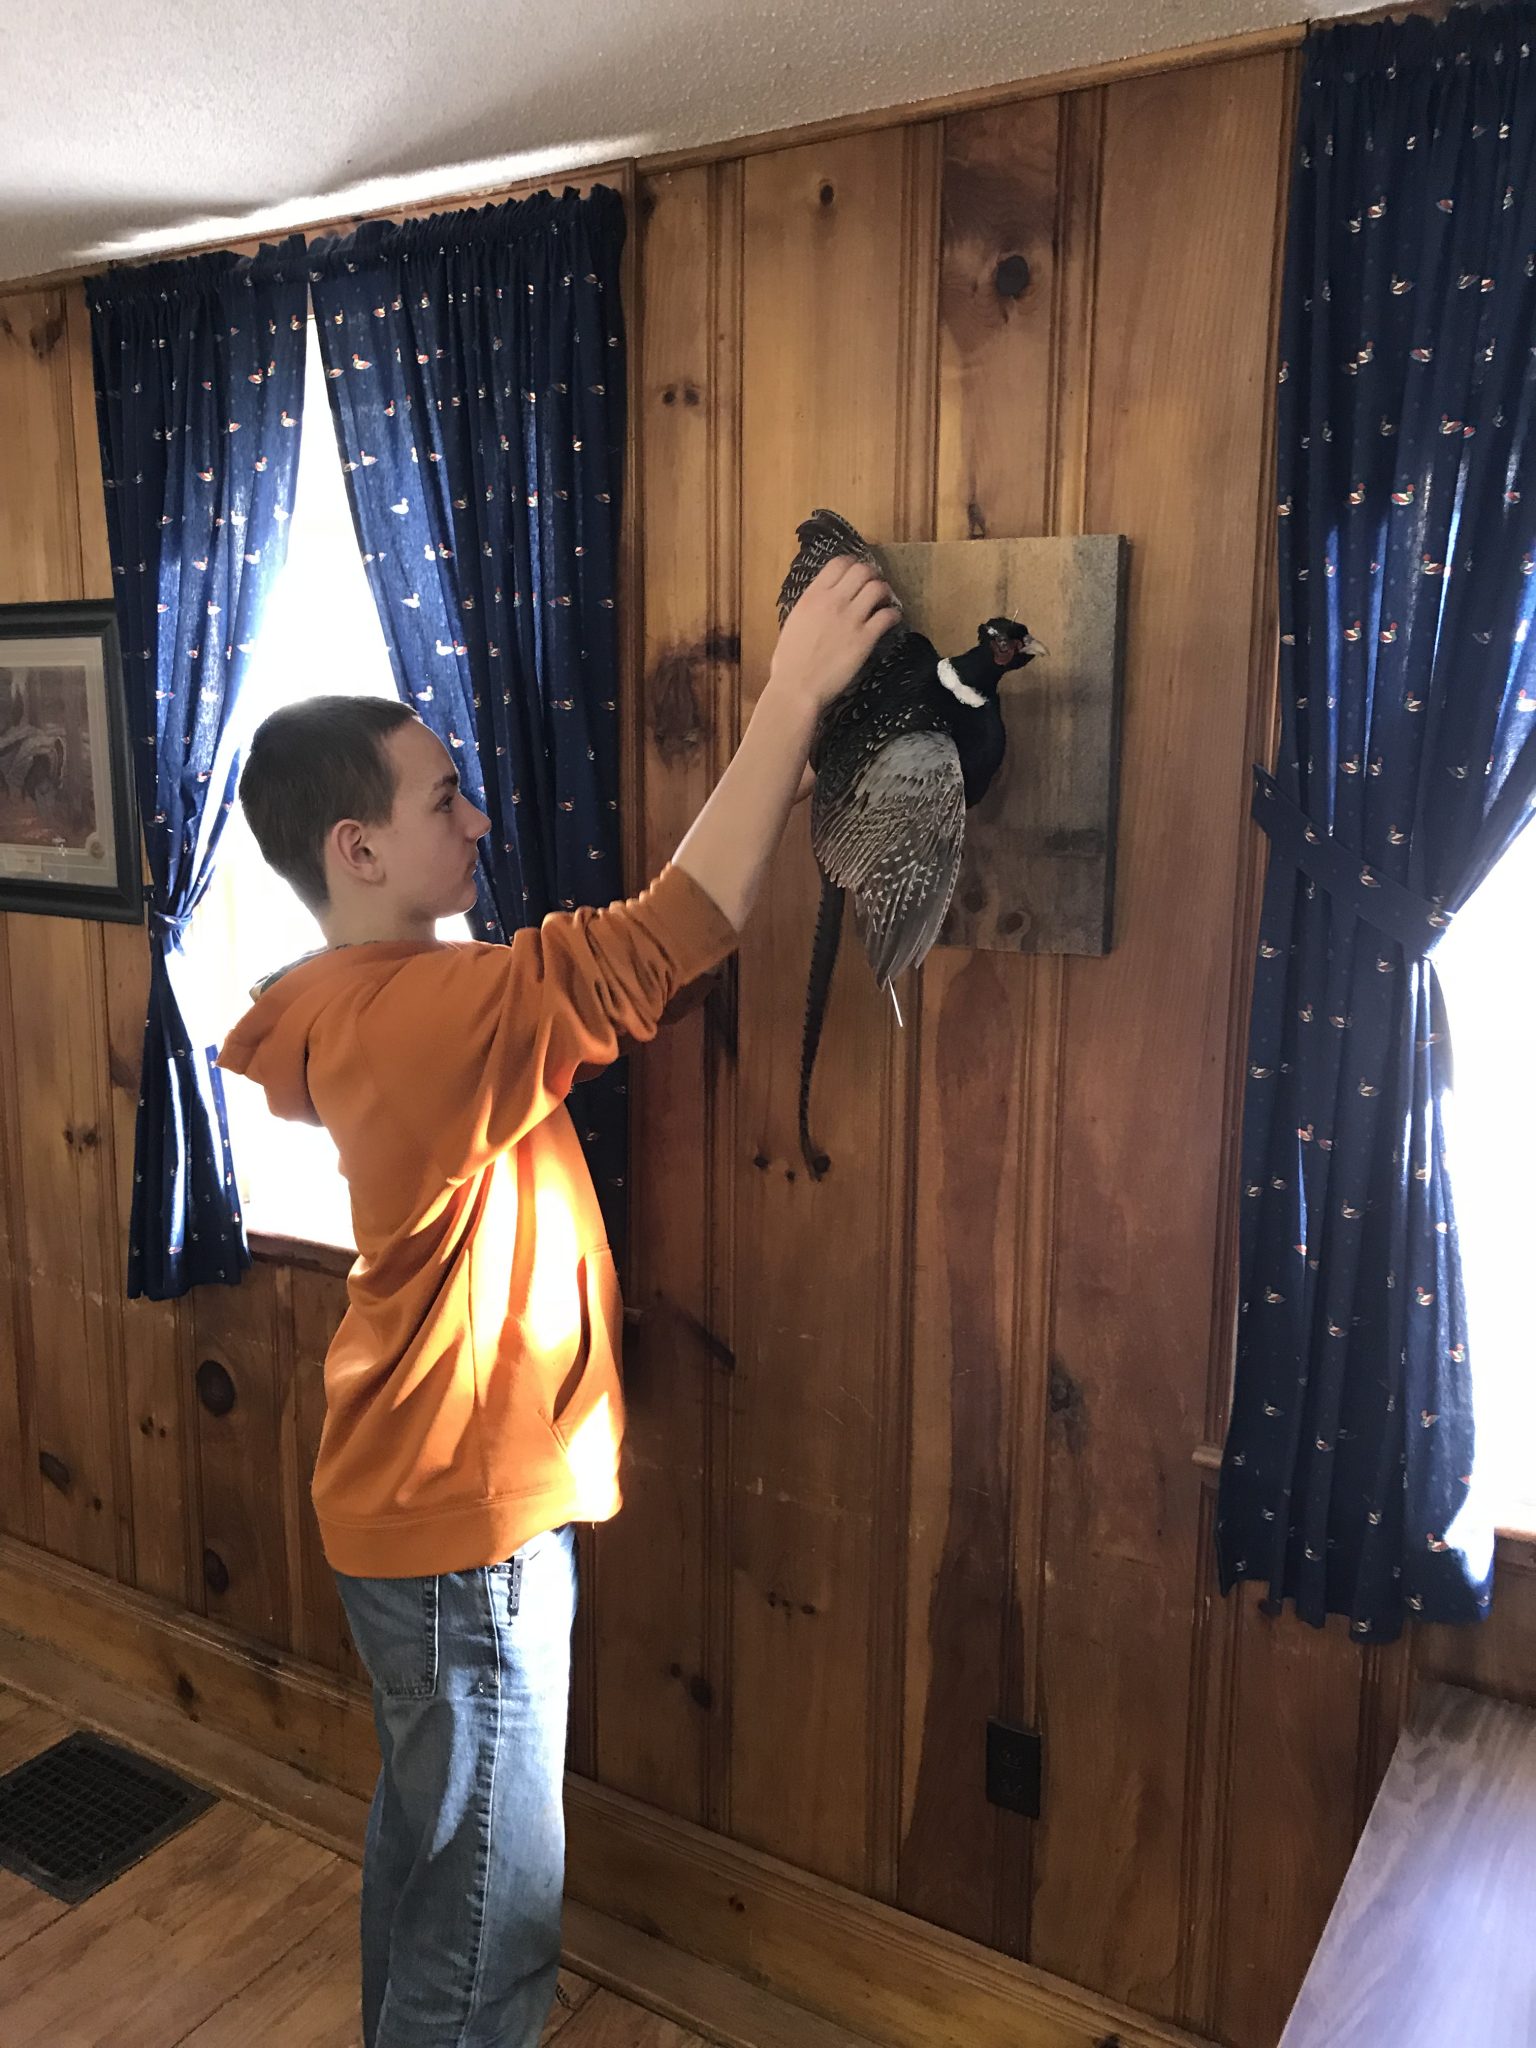
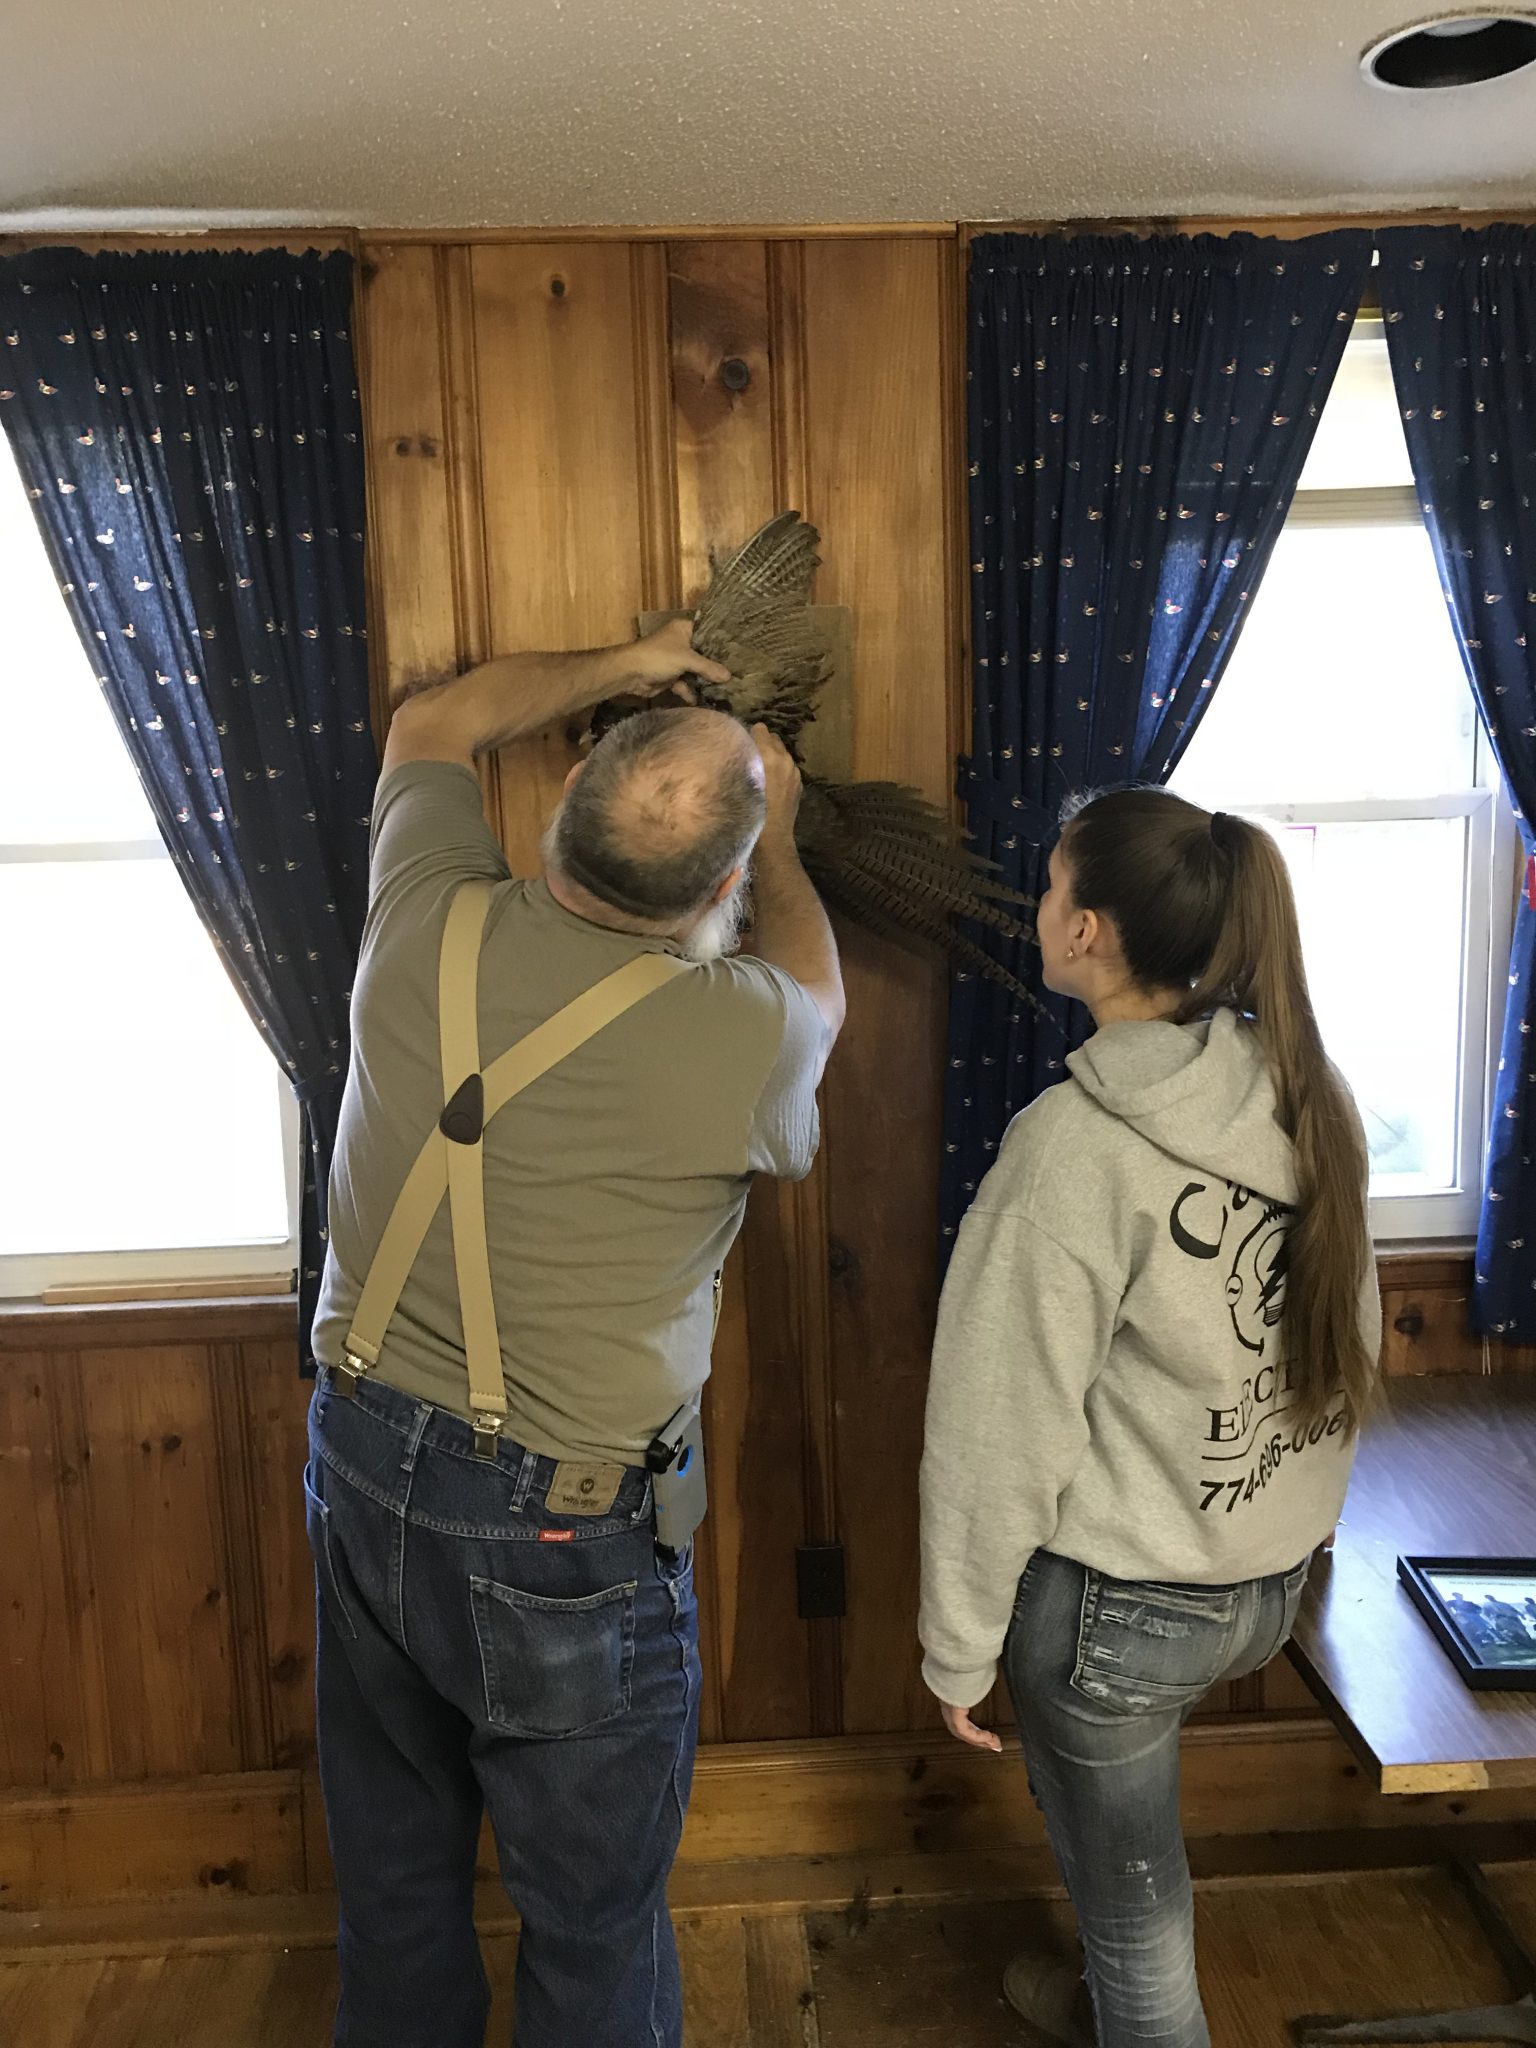
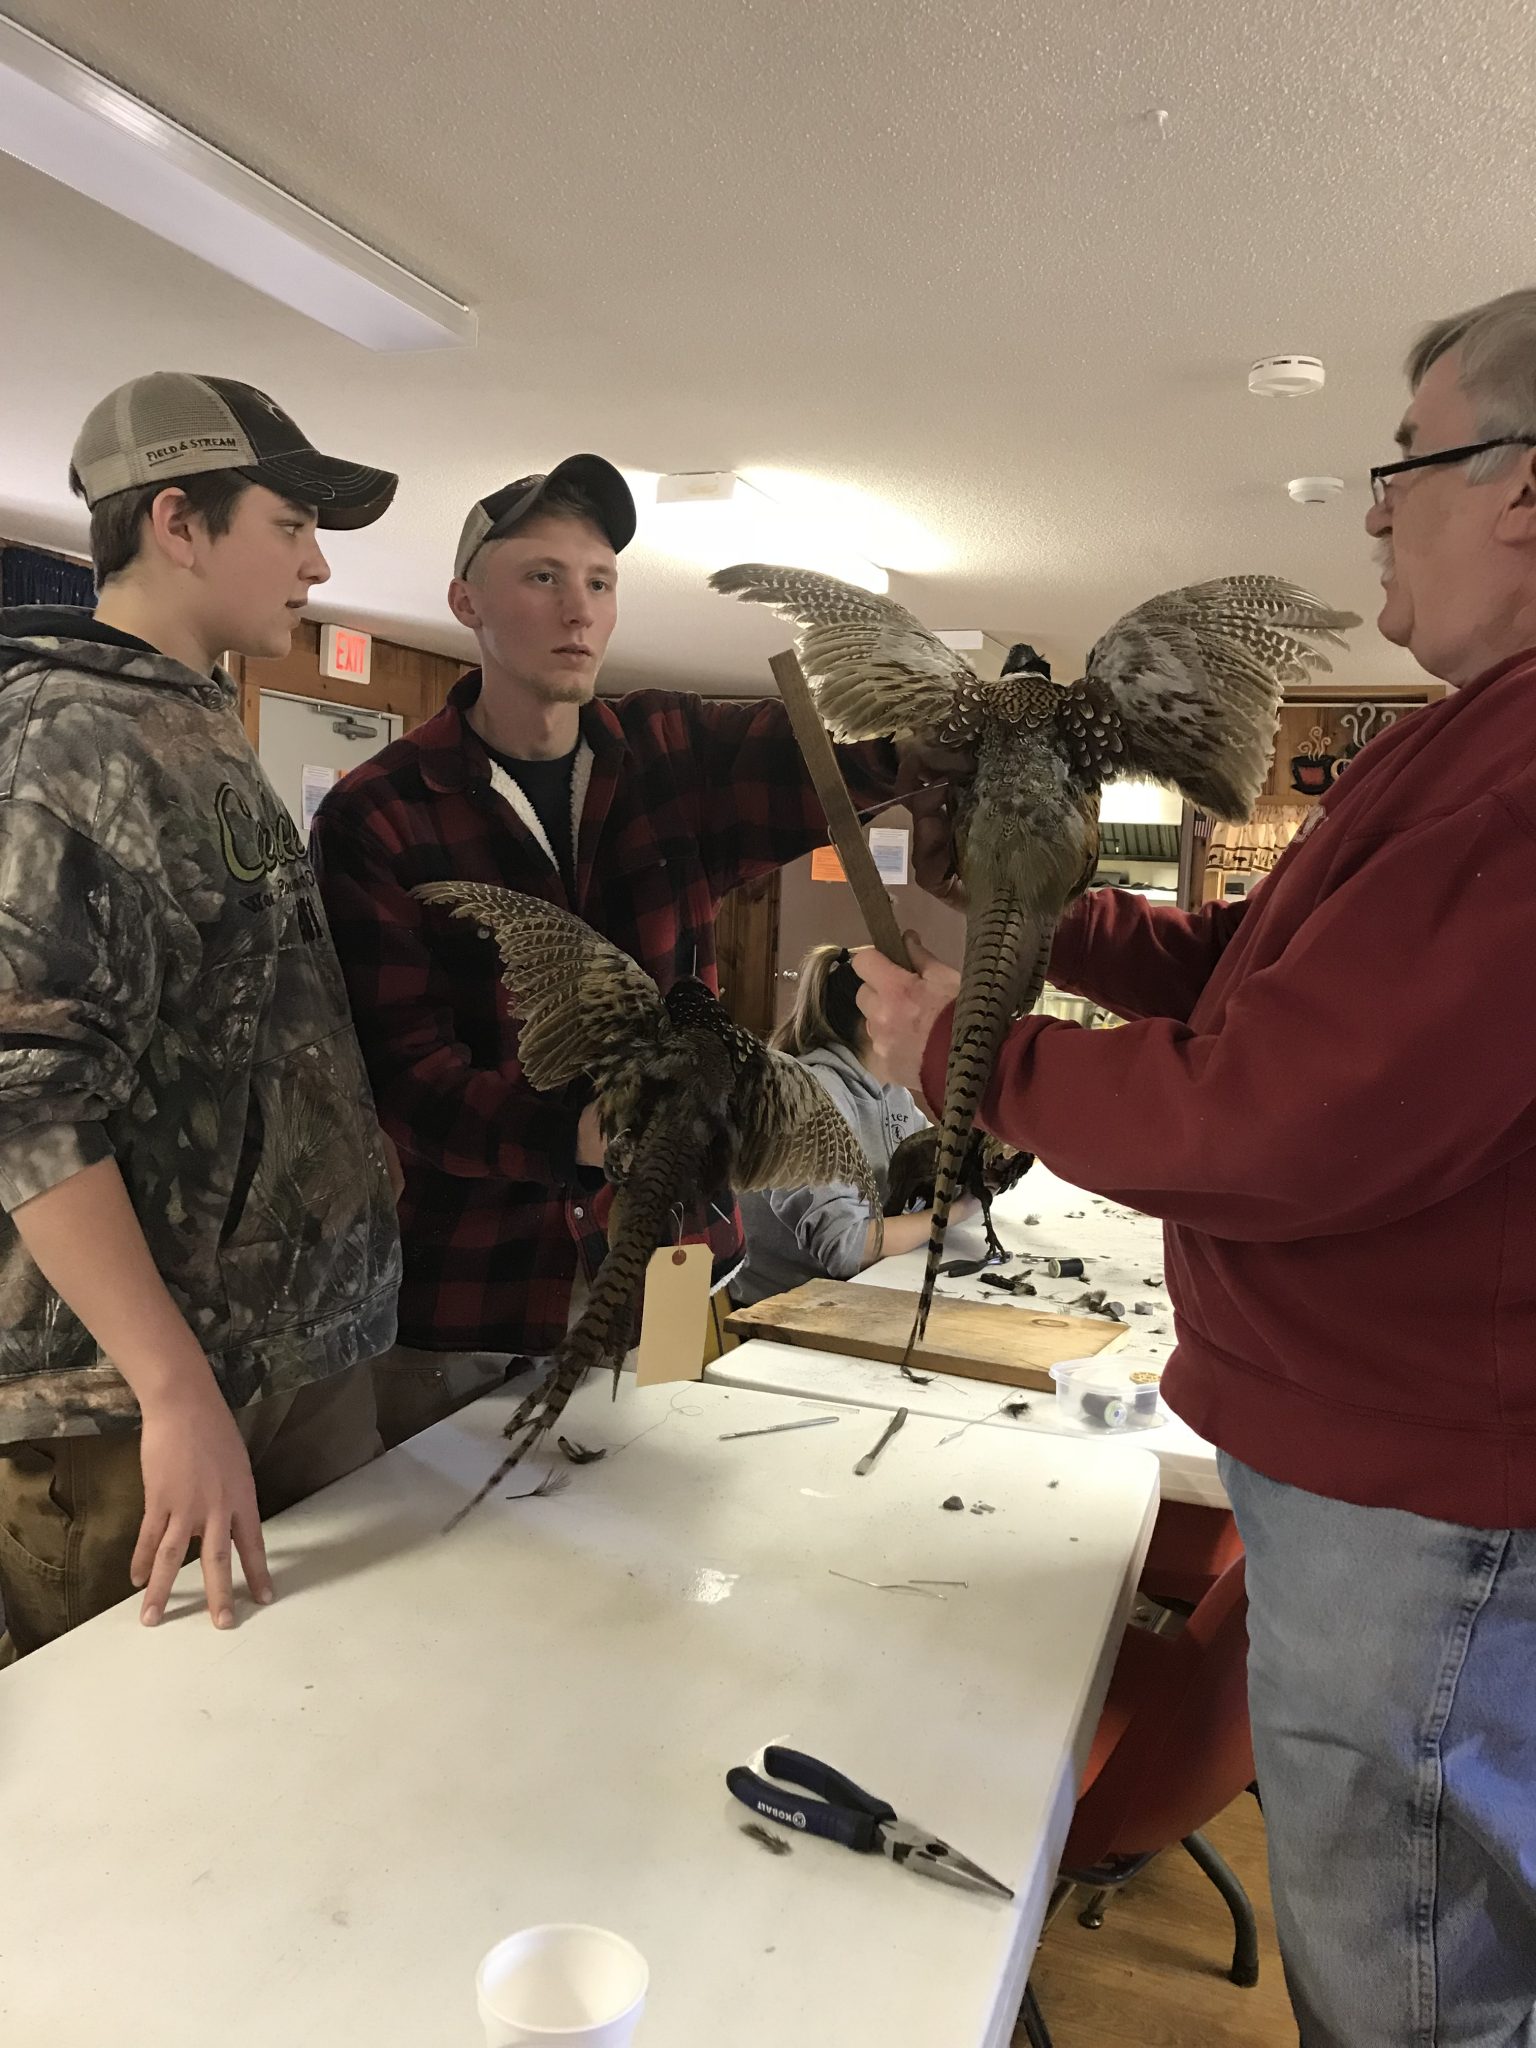
Session 2 transforms the pheasant to being fully formed and mounted for a pose. The pictures depict the key steps 1) rebuilding the skull with clay and adding in glass eyes, 2) sizing a neck and cavity form to the bird, 3) adjusting the wings and legs into a pose, 4) sewing head/neck skin, the chest skin, and the wing skin over the forms, 5) mounting the pose to a wall plaque, 6) making many fine adjustments of the wings, feathers, and the pose. Students left the class with their pheasant ready for display. Over the next 8 weeks, as the pheasant’s skin will dry further – it will tighten up, locking the pose permanently.
Every student is proud of their newly learned taxidermy work and deeply appreciative of Curt, the taxidermist, who imparted a wealth of knowledge and confidence for everyone. Students can now take on future bird projects – be it ducks, geese, turkeys, more pheasants, quail, or grouse. The process steps they learned are the same, however each type bird has unique characteristics such as body fat and size that will take patience and focus, affecting total time to mount it– with the end result being a life-size bird that students can recall their time afield.